How to Make a Solid Conditioner Bar for Curly Hair
If you have ever navigated the “curly girl” method or spent hours trying to detangle a bird’s nest of curls, you know that moisture is the absolute holy grail. However, as we move towards more sustainable and ethical beauty routines, many of us are looking to ditch the bulky plastic bottles that clutter our showers. Finding a high-performing, plastic-free alternative that actually works for textured hair can be a challenge. That is exactly why learning how to make a solid conditioner bar for curly hair DIY style is such a game-changer for your hair care routine.
Making your own hair care products allows you to control every single ingredient that touches your scalp and strands. For curly hair, which is naturally drier and more prone to frizz, a generic shop-bought bar often lacks the “slip” and deep hydration needed to define those beautiful coils. By following this solid conditioner bar curly hair DIY guide, you will create a salon-quality product that is specifically formulated to provide intense moisture, incredible detangling power, and a lightweight finish that won’t weigh your curls down. Plus, you will be doing your bit for the planet by eliminating single-use plastics from your bathroom.
What Is a Solid Conditioner Bar?
A solid conditioner bar is essentially a concentrated version of your favourite liquid conditioner, but without the water content. In a traditional bottle of conditioner, water can make up to 90% of the product. By removing the water, we are left with a potent, solid block of conditioning agents, nourishing butters, and botanical oils. These bars are designed to melt slightly when they come into contact with warm water and the friction of your hair, releasing a creamy, rich emulsion that coats each strand.
Because they are so concentrated, a single 50g to 70g bar can often last as long as two or three standard bottles of liquid conditioner, making them an incredibly cost-effective and space-saving solution. They are also the perfect travel companion, as they are completely leak-proof and won’t cause any issues with liquid restrictions at the airport. For those of us committed to zero waste hair care, these bars represent a significant step towards a more sustainable beauty routine without compromising on the health and appearance of our hair.
Benefits of a Solid Conditioner Bar for Curly Hair
Curly hair has unique needs that differ significantly from straight or wavy hair types. The natural oils produced by the scalp often struggle to travel down the coiled hair shaft, leaving the ends dry and brittle. Here are the primary benefits of using a DIY solid conditioner bar for your curls:
- Exceptional Slip and Detangling: One of the most important factors for curly hair is “slip”—the ability of a product to help your fingers or a comb glide through knots. This DIY recipe uses BTMS-50, a cationic emulsifier that binds to the hair shaft, smoothing the cuticle and making detangling a breeze.
- Intense Moisture Retention: By using rich butters like cocoa or shea and nourishing oils like argan, these bars provide a protective barrier that locks in moisture. This helps to prevent frizz and keeps your curls looking defined and bouncy throughout the day.
- Plastic-Free and Eco-Friendly: Transitioning to a solid bar is one of the easiest ways to reduce your environmental footprint. By making your own, you can ensure that your sustainable beauty journey is truly plastic-free hair care from start to finish.
- Customisable Formulation: Unlike mass-produced products, a DIY bar can be tailored to your specific curl type. Whether you have fine 2C waves or thick 4C coils, you can adjust the ratios of oils and butters to find the perfect balance for your hair’s porosity and needs.
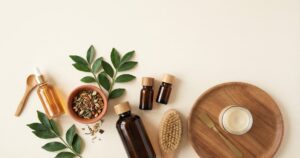
What You Need
To create a high-quality detangling conditioner bar, you will need a few specific ingredients that provide the structure, slip, and nourishment your curls crave. Here is the list of ingredients for a standard 100g batch:
- BTMS-50 (Behentrimonium Methosulfate): 50g – A plant-based conditioning emulsifier that provides incredible slip.
- Cetyl Alcohol: 15g – A fatty alcohol that helps to thicken the bar and adds even more slip.
- Cocoa Butter: 15g – Provides a firm structure to the bar and offers deep nourishment for dry curls.
- Argan Oil or Jojoba Oil: 10g – Lightweight oils that mimic natural sebum, adding shine without greasiness.
- Panthenol (Pro-Vitamin B5): 2g – A humectant that helps to strengthen the hair shaft and improve elasticity.
- Broccoli Seed Oil: 5g – Often called “nature’s silicone,” this oil provides amazing shine and smoothness.
- Essential Oils: 2g – Lavender or Rosemary are great choices for hair health and a lovely natural scent.
- Vitamin E Oil: 1g – An antioxidant that helps to protect the oils in your bar.
Step-by-Step Recipe: How to Do It
Creating your own moisturizing hair bar is a straightforward process that feels a bit like a fun science experiment. Follow these steps to ensure a perfect result every time:
- Prepare Your Workspace: Ensure all your equipment is clean and dry. You will need a double boiler, a digital scale, a stirring tool, and a silicone mould.
- Phase A – The Melt: In your double boiler, combine the BTMS-50, Cetyl Alcohol, Cocoa Butter, and Argan Oil. Heat gently over medium-low heat, stirring occasionally, until everything has completely melted into a clear, uniform liquid.
- Phase B – The Cool Down: Once the mixture is fully melted, remove the bowl from the heat. Allow it to cool slightly for a few minutes, but do not let it start to solidify.
- Add the Extras: Stir in the Panthenol, Broccoli Seed Oil, Essential Oils, and Vitamin E Oil. Mix thoroughly to ensure all the ingredients are evenly distributed throughout the liquid.
- Pour into Moulds: Carefully pour the liquid mixture into your silicone mould. If you notice any bubbles on the surface, you can give the mould a gentle tap on the bench to release them.
- Let It Set: Allow the bar to sit at room temperature for several hours until it is completely hard. For faster results, you can pop the mould into the fridge for about 30 to 60 minutes.
- Unmould and Cure: Once the bar is firm to the touch, gently pop it out of the mould. Letting it sit in a cool, dry place for 24 hours will help it harden further, making it last longer in the shower.
Tips for Best Results
Using a solid conditioner bar is a little different from using a liquid one. To get the most out of your solid conditioner bar curly hair DIY creation, keep these tips in mind:
- Swipe, Don’t Scrub: When applying the bar, focus on the mid-lengths and ends of your hair. Swipe the bar down the hair shaft in long, smooth motions. Avoid rubbing the bar vigorously against your scalp.
- Use Warm Water: The bar needs a bit of warmth to “activate” and release its creamy goodness. Ensure your hair is thoroughly wet with warm water before you start applying the bar.
- Detangle in the Shower: Use the amazing slip of the bar to detangle your curls while the conditioner is still in your hair. A wide-tooth comb or your fingers will glide through much easier, reducing breakage.
- Proper Storage is Key: To make your bar last as long as possible, it must be allowed to dry out completely between uses. Use a draining soap dish to keep it away from standing water and the direct spray of the shower.
Safety and Patch Testing
Even though we are using natural and gentle ingredients, it is always important to practice safety when making your own skincare and hair care products. Ensure you are working in a well-ventilated area, especially when melting ingredients. If you are new to any of the ingredients used in this recipe, we highly recommend performing a patch test. Apply a small amount of the melted mixture to the inside of your forearm and wait 24 hours to ensure no irritation occurs. If you have sensitive skin or known allergies, always consult with a professional before trying new DIY recipes.
Frequently Asked Questions
Q: Will a solid conditioner bar weigh down my fine curls?
A: Not if you use it correctly! The beauty of this DIY recipe is that it is highly concentrated. You only need a small amount to get great results. By focusing the application on your ends and avoiding the roots, you can enjoy all the moisture without losing your volume.
Q: How long does a DIY conditioner bar actually last?
A: Depending on the length and thickness of your hair, a 70g bar can last anywhere from 40 to 60 washes. This is roughly equivalent to two or three standard bottles of liquid conditioner, making it a very economical choice for your sustainable beauty routine.
Q: Can I use this bar as a leave-in conditioner?
A: Yes! Because this bar is made with high-quality oils and conditioning agents like BTMS-50, you can use a tiny amount as a leave-in treatment. After rinsing out your main conditioner, simply swipe the bar once or twice over your damp ends to provide extra protection and definition as your hair dries.
Conclusion
Embracing a solid conditioner bar curly hair DIY project is a rewarding way to elevate your hair care routine while supporting zero waste hair care principles. By crafting your own bars, you are not only ensuring your curls receive the specific nourishment they need but also taking a stand against unnecessary plastic waste. These bars offer incredible slip, deep hydration, and the convenience of a travel-friendly format that fits perfectly into a modern, conscious lifestyle. We encourage you to gather your ingredients and try this recipe today—your curls (and the planet) will thank you for it!
You May Also Like