How to Make a Zero-Waste Body Oil with Dried Botanicals
Are you looking for a simple way to elevate your daily self-care ritual while reducing your environmental footprint? Making your own zero waste body oil dried botanicals DIY style is one of the most rewarding projects for any home formulator. Not only does it allow you to skip the plastic packaging and synthetic fragrances found in many commercial moisturisers, but it also gives you complete control over the nourishing ingredients that touch your skin. Imagine a luxurious, golden oil infused with the calming scent of lavender or the healing power of calendula, all crafted in your own kitchen with minimal waste.
In this guide, we will walk you through everything you need to know to create a professional-grade, botanical-infused body oil. Whether you are a seasoned DIY enthusiast or a complete beginner, you will find that this process is surprisingly straightforward and deeply satisfying. By choosing high-quality carrier oils and dried botanicals, you can create a natural body moisturiser that rivals high-end boutique brands, all while supporting a more sustainable skincare DIY routine. Let’s dive into the world of oil infusions and discover how to harness the power of nature for glowing, healthy skin.
What Is Zero-Waste Body Oil?
A zero-waste body oil is a liquid moisturiser designed to hydrate and nourish the skin using only natural, biodegradable ingredients and reusable or compostable packaging. Unlike traditional lotions, which are often composed of up to 70% water and require synthetic preservatives and plastic bottles, a body oil is a concentrated blend of plant-based carrier oils and botanical extracts. The “zero-waste” aspect focuses on the entire lifecycle of the product: from sourcing bulk ingredients in glass or metal containers to using dried botanicals that can be composted after the infusion process.
The heart of this product is the botanical oil infusion. This is a traditional method where dried herbs and flowers are steeped in a carrier oil to extract their therapeutic properties, such as antioxidants, vitamins, and essential fatty acids. By making your own zero waste body oil dried botanicals DIY at home, you eliminate the need for single-use plastics and ensure that every ingredient serves a purpose for your skin’s health. It is a beautiful marriage of ancient herbalism and modern sustainability, perfect for anyone looking to simplify their beauty cabinet.
Benefits of Zero-Waste Body Oil for Skin
Switching to a botanical-infused body oil offers numerous advantages for both your complexion and the planet. Here are the top benefits of incorporating this DIY staple into your routine:
- Deep and Lasting Hydration: Unlike water-based lotions that can evaporate quickly, plant oils mimic the skin’s natural sebum. This allows them to penetrate deeply and create a protective barrier that locks in moisture, leaving your skin feeling soft and supple all day long.
- Rich in Bioactive Nutrients: When you infuse oils with dried botanicals like rose petals or chamomile, the oil absorbs the plant’s natural goodness. This includes skin-soothing antioxidants, anti-inflammatory compounds, and essential vitamins that help repair and protect the skin from environmental stressors.
- Gentle and Non-Toxic: Many commercial body products contain “fragrance” or “parfum,” which can be a cocktail of undisclosed chemicals. By making your own, you use only pure carrier oils and optional essential oils, making it an ideal natural body moisturiser for those with sensitive skin or allergies.
- Sustainable and Eco-Friendly: By reusing glass pump bottles and sourcing ingredients responsibly, you significantly reduce your plastic waste. The spent botanicals can be returned to the earth through composting, completing a truly circular beauty cycle.
- Highly Customisable: You can tailor your recipe to suit your specific skin needs. Whether you need a lightweight oil for summer or a heavy, nourishing blend for dry Australian winters, the choice of carrier oils and botanicals is entirely up to you.
What You Need
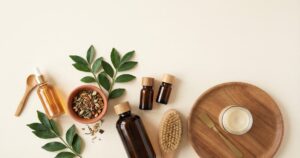
To get started with your zero waste body oil dried botanicals DIY project, you will need a few basic supplies. We recommend sourcing these from reputable Australian suppliers to ensure the highest quality and to support local businesses.
- 1 cup Carrier Oil: Choose an oil that suits your skin type. Sweet almond oil is a great all-rounder, while jojoba oil is excellent for oily or acne-prone skin.
- 1/4 cup Dried Botanicals: Use high-quality, pesticide-free dried flowers. Popular choices include calendula (for healing), lavender (for calming), or rose petals (for luxury).
- 1/2 tsp Vitamin E Oil (Optional): Acts as a natural antioxidant to help prevent the oils from going rancid and provides extra skin nourishment.
- 10-15 drops Essential Oils (Optional): For a natural scent. Lavender, frankincense, or sweet orange work beautifully.
- Sterilised Glass Jar: For the infusion process (a recycled jam jar works perfectly).
- Dark Glass Bottle: For storing your finished body oil (to protect it from light degradation).
- Fine Mesh Strainer or Cheesecloth: To remove the botanicals after infusion.
Step-by-Step Recipe: The Solar Infusion Method
The solar infusion method is a slow, gentle way to extract the benefits of your botanicals using the natural warmth of the sun. It requires patience, but the result is a potent and beautiful oil.
- Prepare Your Botanicals: Ensure your dried botanicals are completely free of moisture. Any water introduced into the oil can cause mold to grow. If you have harvested your own flowers, make sure they are thoroughly dried before use.
- Combine Ingredients: Place your dried botanicals into a clean, dry glass jar until it is about one-third full. Pour your chosen carrier oil over the herbs until the jar is almost full, leaving about an inch of headspace at the top.
- Seal and Shake: Tighten the lid and give the jar a good shake to ensure all the botanicals are submerged and there are no trapped air bubbles.
- The Infusion Period: Place the jar in a warm, sunny spot (like a windowsill) for 2 to 4 weeks. The gentle heat from the sun will encourage the plant’s properties to migrate into the oil. Shake the jar once a day to keep the infusion active.
- Strain the Oil: After the infusion period, place a piece of cheesecloth or a fine-mesh strainer over a clean bowl. Pour the oil through, squeezing the cloth tightly to extract every last drop of the nutrient-rich oil.
- Final Touches: Add your Vitamin E oil and essential oils to the strained mixture. Stir well to combine.
- Bottle and Label: Transfer your finished zero waste body oil dried botanicals DIY into a dark glass bottle. Don’t forget to label it with the ingredients and the date you made it!
Tips for Best Results
To ensure your DIY body oil is as effective and long-lasting as possible, keep these professional tips in mind:
- Quality Matters: Always use high-quality, cold-pressed carrier oils. These oils have undergone minimal processing, meaning they retain more of their natural vitamins and minerals compared to refined versions.
- Keep it Dry: We cannot stress this enough—only use dried botanicals. Fresh plants contain water, which is a breeding ground for bacteria and mold in an oil-based product. If you see any cloudiness or off-smells, discard the batch and start again.
- Storage is Key: Light and heat are the enemies of natural oils. Store your finished product in a cool, dark place. Using amber or blue glass bottles helps filter out UV rays that can cause the oil to oxidise and lose its potency.
- The “Wet Skin” Trick: For the best absorption, apply your body oil immediately after showering while your skin is still slightly damp. This helps the oil lock in the water on your skin’s surface, providing even deeper hydration.
Safety and Patch Testing
While natural ingredients are generally safe, it is important to remember that everyone’s skin is different. Some people may have sensitivities to specific plants or essential oils. Before applying your new body oil all over, perform a patch test. Apply a small amount of the oil to the inside of your wrist or elbow and wait 24 hours to check for any redness, itching, or irritation. If you are pregnant, nursing, or have a chronic skin condition, consult with a healthcare professional before using new essential oils in your eco-friendly beauty routine.
Frequently Asked Questions
How long does DIY body oil last?
When stored in a cool, dark place, your botanical-infused body oil should last between 6 to 12 months. Adding Vitamin E oil can help extend the shelf life by preventing oxidation. Always check for changes in scent or colour, which can indicate the oil has gone rancid.
Can I use this oil on my face?
Yes, but it depends on the carrier oils you choose. For facial use, lightweight oils like jojoba, hemp seed, or argan oil are preferred as they are non-comedogenic (meaning they won’t clog pores). If you have oily or acne-prone skin, avoid heavier oils like coconut or olive oil on the face.
What should I do with the leftover botanicals?
The beauty of a zero waste body oil dried botanicals DIY is that the “waste” isn’t waste at all! Once you have strained the oil, the spent botanicals can be added to your compost bin. Alternatively, you can mix them with some coarse sea salt or sugar for a one-time-use exfoliating body scrub before composting.
Conclusion
Creating your own zero-waste body oil is a simple yet powerful step toward a more mindful and sustainable lifestyle. By mastering the art of the solar infusion method, you can turn basic kitchen ingredients into a luxurious, high-performance skincare product that nourishes your body and respects the planet. There is something truly special about using a product you have crafted with your own hands, knowing exactly what is inside every drop. So, why not gather some dried botanicals and start your first infusion today? Your skin—and the earth—will thank you for it.
You May Also Like