Ingredient sourcing note: Some ingredients mentioned in this article are available from The Skin Science Company (theskinsciencecompany.com.au), an Australian cosmetic raw materials supplier. We recommend them based on the quality and availability of their products. We have no commercial, affiliate, or sponsorship relationship with them and receive no payment or commission for these mentions.
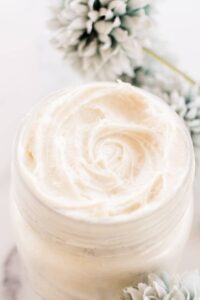
The skin barrier is our first line of defence against environmental stressors, pollutants, and dehydration. When this barrier is compromised, we experience redness, irritation, and the dreaded “tight” feeling. One of the most effective ways to restore this vital shield is through a DIY ceramide moisturiser. Ceramides are the lipid “mortar” that holds our skin cells together, and in this guide, we will explore how to formulate a high-performance barrier repair cream that rivals luxury clinical brands.
Understanding the Skin Barrier and the Role of Ceramides
To formulate an effective DIY ceramide moisturiser, we first need to understand the “bricks and mortar” model of the skin. Our skin cells (corneocytes) act as the bricks, while a complex matrix of lipids acts as the mortar. This lipid matrix is composed of approximately 50% ceramides, 25% cholesterol, and 15% free fatty acids. When any of these components are depleted—due to over-exfoliation, harsh weather, or ageing—the barrier becomes “leaky,” leading to trans-epidermal water loss (TEWL).
Ceramides are long-chain lipids that belong to the sphingolipid family. In cosmetic formulation, we typically use Ceramide NP, Ceramide AP, and Ceramide EOP. However, ceramides alone aren’t a magic bullet; they work most effectively when combined with cholesterol and fatty acids in a specific ratio. This synergistic approach is what differentiates a basic lotion from a true barrier repair treatment.
Key Ingredients for Barrier Repair Formulations
When building your formula, you want to select ingredients that mimic the skin’s natural composition. At The Skin Science Company, we provide the high-quality raw materials needed to create professional-grade skincare at home. Below is a breakdown of the essential components for a barrier-supporting moisturiser.
| Ingredient Category | Role in Formula | Recommended SSC Product |
|---|---|---|
| Humectants | Draws moisture into the skin to hydrate the “bricks.” | Vegetable Glycerin |
| Barrier Lipids | Replenishes the lipid matrix and prevents TEWL. | Jojoba Oil (Liquid Wax) |
| Emollients | Softens the skin and provides a smooth skin feel. | Refined Shea Butter |
| Antioxidants | Protects the lipids in the formula from oxidation. | Vitamin E Oil |
| Water Phase | The base for hydration and dissolving water-soluble actives. | Distilled Water |
How to Formulate a DIY Ceramide Moisturiser
Formulating with ceramides requires precision. Pure ceramides are often difficult to work with as they have high melting points and can recrystallise if not properly stabilised. For intermediate DIYers, using a ceramide complex (a pre-dispersed blend of ceramides, cholesterol, and phytosphingosine) is the most reliable method. This ensures the DIY ceramide moisturiser remains stable and the actives remain bioavailable to the skin.
The following formula uses a “Barrier Support” approach, combining a pre-made ceramide complex with nourishing botanical lipids. We recommend using a high-shear mixer (like a stick blender) to ensure a stable emulsion, as ceramide-heavy formulas can be slightly temperamental.
Advanced Barrier Repair Recipe (100g Batch)
| Phase | Ingredient | Weight (%) | Function |
|---|---|---|---|
| Phase A (Water) | Distilled Water | 65.5% | Solvent |
| Phase A (Water) | glycerin” target=”_blank” rel=”noopener sponsored”>Vegetable Glycerin | 3.0% | Humectant |
| Phase B (Oil) | Jojoba Oil | 10.0% | Biomimetic Lipid |
| Phase B (Oil) | Shea Butter (Refined) | 5.0% | Occlusive Emollient |
| Phase B (Oil) | Emulsifying Wax (Non-ionic) | 6.0% | Emulsifier |
| Phase C (Cool Down) | Ceramide Complex | 5.0% | Active (Barrier Repair) |
| Phase C (Cool Down) | Vitamin E Oil | 0.5% | Antioxidant |
| Phase C (Cool Down) | Broad Spectrum Preservative | 1.0% | Preservation |
| Phase C (Cool Down) | Lactic Acid (80% solution) | q.s. | pH Adjuster (target 5.0-5.5) |
Step-by-Step Method
- Sanitisation: Thoroughly clean and sanitise all equipment, beakers, and your workspace with 70% Isopropyl Alcohol.
- Heating: Combine Phase A ingredients in one heat-proof beaker and Phase B ingredients in another. Heat both beakers in a water bath to 70-75°C.
- Emulsification: Once both phases reach the target temperature, slowly pour the Oil Phase (B) into the Water Phase (A) while stirring. Use a stick blender for 1-2 minutes until a white, uniform emulsion forms.
- Cooling: Switch to manual stirring with a spatula as the mixture cools. This helps create a smooth, creamy texture.
- Cool Down Phase: When the emulsion drops below 40°C, add your Phase C ingredients (Ceramide Complex, Vitamin E, and Preservative). Ceramides are heat-sensitive, so this step is crucial.
- pH Testing: Check the pH of your DIY ceramide moisturiser. For barrier repair, a slightly acidic pH of 5.0 to 5.5 is ideal. Adjust with a drop of lactic acid if necessary.
- Packaging: Transfer to a clean, airtight jar or pump bottle. Label with the date and batch number.
Practical Tips for Working with Ceramides
If you are new to working with ceramides, there are a few technical considerations to keep in mind. First, always ensure your emulsifier is compatible with the lipids you are using. Non-ionic emulsifying waxes are generally the safest bet for ceramide-based lotions. Second, pay close attention to the usage rates of your ceramide complex; while it is tempting to add more for “extra” repair, exceeding the recommended 5-10% can destabilise the emulsion.
Another tip for Australian formulators is to consider the seasonal impact on your skin. In the dry winter months, you might want to increase the percentage of Shea Butter or add a touch of Rosehip Oil for extra fatty acid support. In the humid summer, you can lighten the formula by swapping some of the jojoba oil for a lighter emollient like MCT oil.
Conclusion: Strengthening Your Skin from Within
Creating your own DIY ceramide moisturiser is one of the most rewarding projects for any home formulator. By understanding the science of the skin barrier and selecting high-quality, biomimetic ingredients, you can produce a product that truly supports skin health and resilience. Remember that consistency is key—barrier repair takes time, and regular use of a well-formulated ceramide cream will yield the best results for sensitive or compromised skin.
For all your formulation needs, including high-purity oils, butters, and botanical extracts, look no further than The Skin Science Company. As a leading Australian supplier of cosmetic-grade raw materials, they provide the building blocks for your next skincare masterpiece, ensuring your DIY creations meet professional standards of quality and efficacy.
You May Also Like