Have you ever looked at the back of your favourite skincare bottle and wondered why such a simple ingredient list costs so much? If you are a fan of popular brands like The Ordinary or Paula’s Choice, you have likely encountered the skin-transforming power of niacinamide. This versatile vitamin has become a staple in modern skincare routines for its ability to refine pores, brighten dull complexions, and balance oil production. However, you do not need to spend a fortune to get professional results. Learning how to formulate your own DIY niacinamide serum at home is not only cost-effective, but it also allows you to control the exact concentration and purity of the ingredients hitting your skin. Whether you are a beginner formulator or a seasoned DIY enthusiast, this guide will walk you through everything you need to know to create a high-performance, water-based serum that rivals the best commercial products on the market.
Niacinamide, also known as Vitamin B3, is a water-soluble vitamin that works with the natural substances in your skin to help visibly improve enlarged pores, uneven skin tone, fine lines, and dullness. Unlike some more aggressive actives, niacinamide is remarkably stable and generally well-tolerated by most skin types, including sensitive and acne-prone skin. By making your own DIY niacinamide serum, you can customise the formula to include hydrating humectants like hyaluronic acid and glycerin, ensuring your skin stays plump and dewy while the active ingredients do the heavy lifting. In this comprehensive guide, we will explore the science behind this powerhouse ingredient, the importance of pH stability, and provide a step-by-step recipe that you can easily replicate in your home kitchen or studio.
What is Niacinamide and Why Your Skin Needs It?
Before we dive into the mixing process, it is essential to understand why niacinamide has earned its reputation as a “do-it-all” skincare ingredient. As a precursor to two important coenzymes, NADP and NAD, niacinamide plays a vital role in the energy metabolism of your skin cells. This biological process is what allows the ingredient to offer such a wide range of benefits across different skin concerns. When applied topically, it acts as a potent antioxidant, protecting the skin from environmental stressors like pollution and UV damage while simultaneously stimulating the production of ceramides and proteins that form the skin’s protective barrier.
Refining Pore Appearance
One of the most sought-after benefits of a DIY niacinamide serum is its ability to reduce the appearance of enlarged pores. While you cannot technically “shrink” your pores, niacinamide helps by keeping them clear of debris and excess sebum. When oil and dead skin cells become trapped, they stretch the pore lining, making them look significantly larger. By regulating oil production and improving skin elasticity, niacinamide helps the pores return to their natural size, resulting in a smoother, more refined skin texture that looks airbrushed in person.
Fading Dark Spots and Evening Skin Tone
If you struggle with hyperpigmentation, sun spots, or the stubborn red marks left behind by old breakouts, niacinamide is your best friend. It works differently than many other brightening agents. Instead of inhibiting the production of melanin, it prevents the transfer of pigment to the skin cells on the surface. This makes it an excellent choice for evening out the skin tone and restoring a natural radiance to dull, tired-looking complexions. Over time, consistent use of a well-formulated serum can lead to a more uniform and luminous appearance without the irritation often associated with harsher brightening acids.
Balancing Sebum Production
For those with oily or combination skin, managing shine throughout the day can be a constant battle. Niacinamide is unique because it helps to regulate the amount of oil the sebaceous glands produce. By preventing the glands from going into overdrive, it reduces the likelihood of clogged pores and mid-day greasiness. Interestingly, it is also beneficial for dry skin because it increases the production of ceramides, which are the fatty acids that help hold the skin together and lock in moisture. This dual action makes it a rare ingredient that truly balances the skin regardless of your starting point.
Strengthening the Skin Barrier
A healthy skin barrier is the foundation of a clear, glowing complexion. When your barrier is compromised, you may experience redness, flaking, and increased sensitivity. Niacinamide strengthens this barrier by boosting the production of essential lipids and proteins like keratin. This increased structural integrity helps to prevent transepidermal water loss (TEWL), meaning your skin stays hydrated for longer. A strong barrier also means your skin is better equipped to defend itself against irritants and bacteria, making it less prone to inflammation and breakouts.
Why Make Your Own DIY Niacinamide Serum?
The primary motivation for many home formulators is the incredible cost savings. A high-quality niacinamide serum from a luxury brand can cost upwards of fifty or sixty dollars for a small bottle. In contrast, the raw materials required to make a DIY niacinamide serum—such as niacinamide powder, distilled water, and a simple preservative—cost only a few cents per batch. When you buy in bulk, you can produce a year’s supply of serum for the price of a single commercial bottle. This allows you to use the product generously on your neck, chest, and hands without worrying about the expense.
Beyond the financial aspect, making your own skincare provides a level of transparency that commercial products often lack. Many store-bought serums contain “filler” ingredients, synthetic fragrances, or specific textures that might not suit your skin. When you formulate at home, you have 100% control over every drop that goes into the bottle. You can choose to leave out common irritants or add extra boosters like [DIY Hyaluronic Acid Serum](INTERNAL_LINK) for added hydration. This bespoke approach ensures that your skincare is perfectly tailored to your unique needs, rather than being a one-size-fits-all solution designed for mass-market appeal.
Understanding the Formulation: Concentration and pH
When creating a DIY niacinamide serum, the concentration of the active ingredient is one of the most important factors to consider. Most clinical studies showing the benefits of niacinamide use concentrations between 2% and 5%. While many popular commercial brands have pushed the envelope to 10% or even 20%, higher is not always better. For beginners, a 5% concentration is the “sweet spot” that provides maximum benefits with minimal risk of irritation. If your skin is already accustomed to the ingredient, you can safely move up to 10%, but exceeding this level rarely provides additional benefits and may cause temporary redness or “flushing” for some users.
The second critical factor is the pH of your finished serum. Niacinamide is a very stable molecule, but it has a specific “comfort zone” where it performs best. Ideally, your serum should have a pH between 5.0 and 6.0. This range is close to the natural pH of human skin, which typically sits around 4.7 to 5.5. If the pH of your formulation drops below 4.5, the niacinamide can begin to hydrolyse and turn into nicotinic acid. While nicotinic acid is not dangerous, it causes a rapid dilation of the blood vessels in the skin, leading to a prickly, red sensation known as the “niacin flush.” To prevent this, always use a pH meter or high-quality pH strips to test your batch before bottling.
Ingredients and Equipment Needed
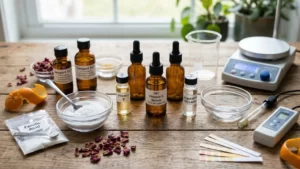
To ensure your DIY niacinamide serum is professional-grade, you will need a few specific ingredients and some basic laboratory equipment. Using the correct tools is the difference between a serum that works and one that potentially harbours bacteria or causes irritation. Always source your raw materials from reputable cosmetic ingredient suppliers to ensure they are of high purity and “cosmetic grade.”
The Ingredient List
- Distilled Water: This serves as the base of your serum. Never use tap or spring water, as the minerals and potential contaminants can destabilise your formula and encourage microbial growth.
- Niacinamide Powder (Vitamin B3): Look for a high-purity, white crystalline powder. It should dissolve easily in water at room temperature.
- Hyaluronic Acid Powder: This acts as a thickener and a powerful humectant. It gives the serum that luxurious, silky “slip” and helps to deeply hydrate the skin.
- Vegetable Glycerin: A classic humectant that draws moisture into the skin. It also helps to prevent the serum from feeling too “tight” as it dries.
- Broad-Spectrum Preservative: This is non-negotiable for any water-based DIY product. Without a preservative like Liquid Germall Plus or Geogard ECT, your serum will grow mould and bacteria within days, even if it looks clear to the naked eye. Learn more about [Natural Preservatives for Skincare](INTERNAL_LINK) to choose the right one for your needs.
The Essential Equipment
Precision is key in formulation. You will need a digital scale that can measure to 0.01 grams, as kitchen scales are not accurate enough for small batches. You will also need heat-resistant glass beakers, a glass stirring rod, and a set of pH testing strips. Before you begin, ensure all your equipment and your final dropper bottle have been thoroughly cleaned and sanitised with 70% isopropyl alcohol to maintain a sterile environment.
The Ultimate DIY Niacinamide Serum Recipe
This recipe makes a 50g batch of a 5% Niacinamide serum. This size is perfect for a standard 50ml dropper bottle and will typically last you 4 to 6 weeks with daily use. We have included a small amount of hyaluronic acid to provide a beautiful texture and a boost of hydration. This formula is designed to be lightweight, non-greasy, and fast-absorbing, making it perfect for layering under your daily moisturiser.
| Ingredient | Percentage (%) | Amount for 50g Batch |
|---|---|---|
| Distilled Water | 88.5% | 44.25g |
| Niacinamide Powder | 5.0% | 2.50g |
| Vegetable Glycerin | 5.0% | 2.50g |
| Hyaluronic Acid (High Molecular Weight) | 1.0% | 0.50g |
| Broad-Spectrum Preservative (e.g., Liquid Germall Plus) | 0.5% | 0.25g |
Step-by-Step Instructions
- Prepare Your Workspace: Clean your surface and sanitise all beakers, scales, and stirring tools with alcohol. Allow them to air dry completely.
- Weigh the Water: Place your clean beaker on the scale, tare it, and carefully weigh out 44.25g of distilled water.
- Dissolve the Niacinamide: Add the 2.5g of niacinamide powder to the water. Stir gently with your glass rod until the liquid is completely clear. Niacinamide is highly water-soluble and should dissolve within a minute.
- Add the Glycerin: Weigh and stir in the 2.5g of vegetable glycerin. This will help the hyaluronic acid incorporate more smoothly in the next step.
- Hydrate the Hyaluronic Acid: Sprinkle the 0.5g of hyaluronic acid powder onto the surface of the liquid. Do not stir vigorously yet, as it may clump. Instead, cover the beaker and let it sit for 2 to 4 hours (or overnight in the fridge) until the powder has fully hydrated into a clear gel.
- Final Mix and Preserve: Once the gel is smooth, stir it gently to ensure everything is well-combined. Add your 0.25g of preservative and mix thoroughly.
- Check the pH: Use a pH strip to test the serum. It should fall between 5.0 and 6.0. If it is too low, you can add a tiny drop of a 10% arginine or baking soda solution to raise it. If it is too high, a tiny drop of citric acid solution can lower it.
- Bottle Your Creation: Pour the finished serum into a sterilised glass dropper bottle. Label it with the name and the date you made it.
Pro Tips for a Perfect DIY Niacinamide Serum
Creating your own DIY niacinamide serum is a rewarding process, but there are a few professional tricks that can take your formulation from “homemade” to “high-end.” One common issue beginners face is clumping when adding hyaluronic acid. To avoid this, you can “slurry” the HA powder in the glycerin before adding the water. This coats the powder particles and prevents them from sticking together when they hit the water, resulting in a much faster and smoother hydration process.
Another tip is to consider the molecular weight of your hyaluronic acid. High molecular weight HA stays on the surface of the skin to provide immediate hydration and a silky feel, while low molecular weight HA penetrates deeper for long-term moisture. For the best of both worlds, you can use a 50/50 split of both types in your 1% total HA concentration. If you find your serum is too thick for your liking, you can reduce the HA to 0.5% and increase the distilled water accordingly. Conversely, if you want a thicker, more “gel-like” consistency, you can increase the HA slightly, though going above 1.5% can sometimes lead to “pilling” when you apply other products on top.
Storage is also vital for maintaining the potency of your active ingredients. While niacinamide is not particularly light-sensitive, your preservative system will last longer if the bottle is kept in a cool, dark place away from direct sunlight. A bathroom cabinet is usually fine, but avoid leaving it on a sunny windowsill. If you notice any change in colour, a cloudy appearance that wasn’t there before, or a strange smell, discard the batch immediately and make a fresh one. Safety first is the most important rule of home formulation.
How to Use Niacinamide in Your Skincare Routine
Once you have successfully created your DIY niacinamide serum, it is time to integrate it into your daily routine. Because it is a water-based serum, it should be applied after cleansing and toning, but before any heavier oils or moisturisers. This “thinnest to thickest” rule ensures that the active ingredients can penetrate the skin effectively without being blocked by occlusive layers. Simply apply 3 to 4 drops to your face and neck, gently pressing it into the skin until absorbed.
Niacinamide is incredibly versatile and plays well with almost every other skincare active. You can safely use it in the same routine as retinol, as niacinamide’s barrier-strengthening properties can actually help to mitigate some of the dryness and irritation often caused by Vitamin A. There was once a myth that you couldn’t use niacinamide and Vitamin C (Ascorbic Acid) together, but modern research has shown that they are perfectly compatible for most people. However, if you have very sensitive skin, you might prefer to use your Vitamin C in the morning and your DIY niacinamide serum in the evening to avoid any potential for temporary flushing.
For the best results, consistency is key. Most users begin to see an improvement in skin texture and oil control within 2 to 4 weeks of daily use. More significant concerns, like hyperpigmentation and the appearance of fine lines, typically take 8 to 12 weeks of consistent application to show dramatic results. Remember to always follow up with a broad-spectrum sunscreen during the day, as protecting your skin from UV damage is the most effective way to maintain the brightening and anti-aging benefits of your new serum.
Embarking on the journey of home formulation is an empowering way to take charge of your skincare. By mastering the DIY niacinamide serum, you have created a versatile, high-performance product that addresses multiple skin concerns while saving you money and ensuring ingredient purity. We hope this guide has given you the confidence to start mixing and that you enjoy the radiant, healthy skin that follows. If you are looking for more inspiration, why not check out our guide on [Essential Oil Safety Guide](INTERNAL_LINK) to learn how to safely scent your future creations.
You May Also Like