The Ultimate Guide to DIY Tinted Sunscreen: Mineral Protection Without the White Cast
We all know that sun protection is the most important step in any Australian skincare routine. However, many of us struggle with the dreaded “white cast” that traditional mineral sunscreens often leave behind. If you have been searching for a way to combine your daily sun protection with a touch of natural-looking coverage, learning how to make a DIY tinted sunscreen mineral blend might be your new favourite skincare project. In this guide, we will explore how to create a custom-tinted mineral barrier that protects your skin while giving you a healthy, sun-kissed glow without the heavy feel of traditional foundations.
Making your own skincare allows you to control exactly what goes onto your face. By using high-quality ingredients like non-nano zinc oxide and natural earth pigments, you can create a product that suits your unique skin tone perfectly. Whether you are heading to the beach or just running errands in Epping, this DIY solution offers a practical and aesthetic way to stay sun-safe. [LINK: natural sun care tips | sun care]
Why Choose a DIY Tinted Sunscreen Mineral Formula?
The primary benefit of a DIY tinted sunscreen mineral product is the use of physical blockers rather than chemical ones. Mineral sunscreens typically use zinc oxide or titanium dioxide to reflect UV rays away from the skin. While these are incredibly effective, they are notorious for being thick and white. By adding natural tints, we transform a functional necessity into a beautiful, multi-tasking beauty balm. This approach is particularly popular among those with sensitive skin who find chemical filters irritating or those who simply prefer a more natural ingredient profile.
In Australia, the sun is particularly harsh, and broad-spectrum protection is non-negotiable. Using a mineral base provides an immediate physical barrier as soon as it is applied, unlike chemical sunscreens which often require twenty minutes to become effective. Adding a tint not only masks the white appearance of the zinc but also provides a small amount of extra protection against blue light from our screens, thanks to the iron oxides found in natural pigments. This makes it an ideal choice for the modern lifestyle where we move between the outdoor sun and indoor digital environments. [LINK: benefits of zinc oxide | ingredients]
Furthermore, mineral sunscreens are often more environmentally friendly. Many chemical sunscreen ingredients have been linked to coral reef bleaching, leading to bans in certain parts of the world. By choosing a mineral-based DIY tinted sunscreen mineral recipe, you are making a choice that is kinder to the planet while still prioritising your skin health. The simplicity of the ingredients also means fewer preservatives and synthetic fragrances, which is a major win for anyone looking to clean up their beauty cabinet.
Understanding SPF and Safety in DIY Sun Care
Before we dive into the recipe, it is crucial to discuss safety. When you make a DIY tinted sunscreen mineral blend at home, you cannot accurately determine the exact SPF rating without professional laboratory testing. In Australia, commercial sunscreens are strictly regulated by the TGA (Therapeutic Goods Administration) to ensure they provide the protection they claim. Because home-made versions aren’t tested in a lab, they should be viewed as “secondary sun protection” or a “tinted moisturiser with mineral benefits.”
To ensure the best possible results, always use non-nano zinc oxide. “Non-nano” means the particles are large enough that they won’t be absorbed into your bloodstream, making them the safer choice for topical application. Additionally, ensure your pigments are cosmetic-grade to avoid skin irritation. Remember to reapply frequently and use other sun protection measures like hats and shade, especially during peak UV hours in the Australian summer. It is always better to be over-prepared when it comes to UV exposure.
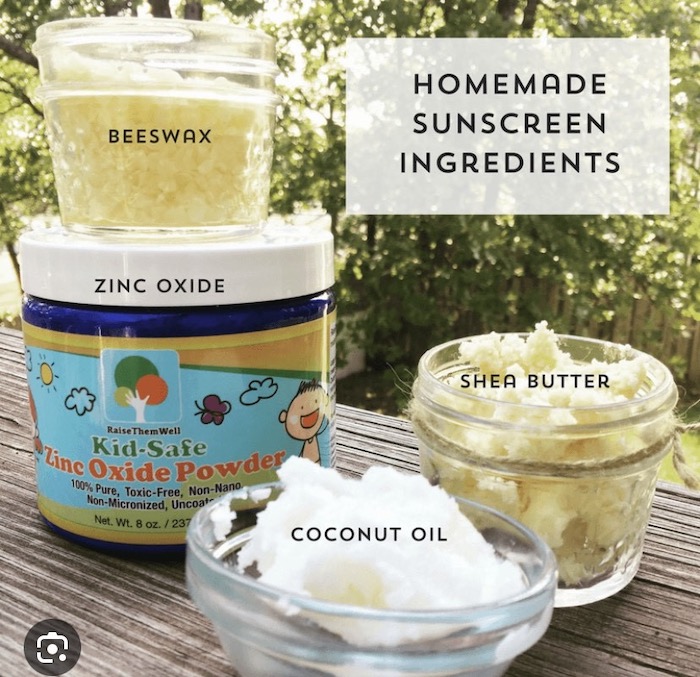
Another safety consideration is the stability of the mixture. Over time, mineral particles can settle or clump, which leads to uneven protection. This is why our recipe includes beeswax and shea butter, which help to keep the zinc oxide suspended evenly throughout the cream. Always give your jar a quick stir or a shake if you notice any separation. Consistency is key to ensuring that every part of your face receives the same level of mineral coverage.
How to Make Your DIY Tinted Sunscreen Mineral Blend
Creating your own tinted mineral protection is surprisingly simple once you have the right base. The key is to create a smooth, stable emulsion that holds the zinc oxide and pigments evenly without clumping. We recommend using a double boiler method to gently melt your butters and oils, ensuring a luxurious texture that glides onto the skin. This recipe focuses on nourishing Australian-sourced ingredients that love your skin as much as they protect it. The process is almost like baking, but for your face!
Ingredients Table
| Ingredient | Amount | Purpose |
|---|---|---|
| Red Raspberry Seed Oil | 30ml | Carrier oil with natural antioxidant properties |
| Shea Butter | 20g | Provides a creamy base and skin nourishment |
| Beeswax Pellets | 10g | Helps with water resistance and stability |
| Non-Nano Zinc Oxide Powder | 20g | The physical mineral sun barrier |
| Iron Oxide Pigments or Cocoa Powder | 1-2 tsp | Provides the custom tint to match your skin tone |
| Vitamin E Oil | 5 drops | Natural antioxidant and preservative |
Step-by-Step Instructions
- Melt the Base: In a glass bowl over a pot of simmering water (double boiler), combine the shea butter, beeswax, and red raspberry seed oil. Stir gently until everything is completely melted and combined into a clear liquid.
- Add the Zinc: Remove the bowl from the heat. Carefully whisk in the non-nano zinc oxide powder. Be very careful not to inhale the fine powder; wearing a mask is a good idea. Whisk until the mixture is completely smooth and no white clumps remain.
- Customise Your Tint: Add your iron oxide pigments or cocoa powder a tiny bit at a time. Test a small amount on your jawline as you go. Remember, the colour will look slightly darker in the jar than it does once it is blended into your skin.
- Cool and Store: Add the Vitamin E oil and give it one final stir. Pour the mixture into a clean, dry glass jar. Let it sit at room temperature until it has completely solidified. Do not put it in the fridge as this can cause the beeswax to grain.
- Application: Apply a generous amount to your face and neck as the last step in your morning skincare routine. Blend well using your fingers or a makeup sponge for a seamless finish.
Tips for the Perfect Tinted Finish
Achieving the perfect DIY tinted sunscreen mineral consistency can take a little practice. If you find your mixture is too thick or hard to spread, you can add a few extra drops of carrier oil like jojoba or sweet almond oil. If it feels too greasy for your liking, a touch of arrowroot powder can help create a more matte finish, which is perfect for those with oily or combination skin types. [LINK: oily skin DIY tips | skin types]
For those with very fair skin, start with a tiny pinch of yellow iron oxide and a hint of cocoa powder. For deeper skin tones, increase the amount of brown iron oxide or use a blend of dark cocoa and a touch of cinnamon for warmth. Always store your DIY creation in a cool, dark place to maintain the integrity of the oils. Since this recipe doesn’t contain water, it has a shelf life of about 3 to 6 months, but always check for changes in scent or texture before use. If you live in a very hot climate, you might need to increase the beeswax slightly to keep the product from melting in the jar.
Another pro-tip is to apply your DIY tinted sunscreen mineral cream in layers. Start with a thin layer and let it “set” for a minute before adding more coverage where needed. This prevents the product from feeling too heavy or “cakey” on the skin. If you use a face oil or serum beforehand, make sure it is fully absorbed so the mineral cream can adhere properly to your skin surface.
Conclusion: Glowing and Protected
Transitioning to a DIY tinted sunscreen mineral routine is a fantastic way to simplify your morning while ensuring your skin stays protected from the harsh Australian sun. By combining the power of non-nano zinc oxide with natural tints, you can say goodbye to the white cast and hello to a radiant, even complexion. It is an empowering step towards a more natural, sustainable beauty routine that you can feel proud of. Not only are you saving money, but you are also reducing your exposure to unnecessary chemicals and supporting your skin’s health with pure, natural ingredients.
Ready to start your DIY skincare journey? Explore our full range of raw ingredients and expert guides to find everything you need for your next project. From high-quality oils to the perfect mineral powders, we have you covered. Don’t forget to share your results with us and let us know how your custom tint turned out. Stay safe, stay glowing, and enjoy the beautiful Australian sunshine responsibly! Your skin will thank you for the extra love and care you put into your daily routine.
You May Also Like