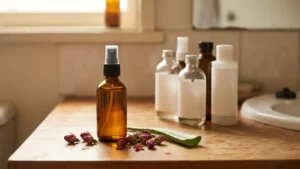
DIY Vitamin E Oil Serum for Scars and Dark Spots
If you have ever dealt with stubborn acne scars or those annoying dark spots that seem to linger long after a blemish has healed, you are certainly not alone. Many of us in the DIY skincare community are constantly searching for natural, effective ways to achieve a clearer and more even complexion. One of the most powerful and time-tested ingredients for skin repair is Vitamin E, a potent antioxidant that has been a staple in skincare routines for decades. By creating your own DIY vitamin E oil serum, you can harness the pure power of this nutrient without the unnecessary fillers or harsh preservatives often found in commercial products.
In this guide, we will explore why Vitamin E is such a powerhouse for skin regeneration and how you can easily formulate a professional-grade serum in your own kitchen. Whether you are a seasoned home formulator or just starting your journey into natural beauty, this simple yet effective recipe will help you target hyperpigmentation and support your skin’s natural healing process. Let’s dive into the world of antioxidants and discover how to create a nourishing treatment that your skin will absolutely love.
What Is Vitamin E?
Vitamin E is not actually a single substance but rather a group of eight fat-soluble compounds with powerful antioxidant properties. In the world of skincare, the most common and effective form you will encounter is alpha-tocopherol. Naturally occurring in various seeds, nuts, and leafy greens, Vitamin E plays a crucial role in protecting our bodies from oxidative stress. When applied topically in a DIY vitamin E oil serum, it acts as a shield for your skin cells, neutralising free radicals generated by environmental factors like UV radiation and pollution.
For home formulators, it is important to distinguish between pure Vitamin E oil (tocopherol) and Vitamin E acetate. While both are used in skincare, pure tocopherol is generally preferred for its direct antioxidant benefits and its ability to help prevent other oils in your serum from going rancid. It is a thick, amber-coloured liquid that is highly viscous, which is why we always recommend diluting it into lighter carrier oils for the best application experience. Understanding this ingredient is the first step toward creating effective DIY skincare that truly delivers results for scars and dark spots.
Benefits of Vitamin E for Skin
The benefits of incorporating a DIY vitamin E oil serum into your nightly routine are numerous, particularly if you are focused on repairing damaged skin or evening out your skin tone. Here are the primary ways this incredible nutrient supports your skin health:
- Powerful Antioxidant Protection: Vitamin E is renowned for its ability to neutralise free radicals. These unstable molecules can damage collagen and elastin, leading to premature ageing and making it harder for scars to heal properly. By providing a boost of antioxidants, you are giving your skin the protection it needs to stay resilient.
- Enhanced Skin Regeneration: One of the main reasons people turn to Vitamin E for scars is its role in skin cell turnover. It helps to speed up the healing process of the skin’s surface, which can lead to a faster reduction in the appearance of post-inflammatory hyperpigmentation and minor scarring.
- Deep Hydration and Barrier Support: As a fat-soluble vitamin, it integrates perfectly with your skin’s natural lipid barrier. This helps to lock in moisture and prevent transepidermal water loss, leaving your skin feeling soft, supple, and well-hydrated. A healthy moisture barrier is essential for the skin to repair itself effectively.
- Reduction in Inflammation: If your dark spots are accompanied by redness or irritation, Vitamin E can help. It has natural anti-inflammatory properties that soothe the skin, making it an excellent choice for those with sensitive or reactive skin types who are looking to calm their complexion while targeting spots.
- Synergistic Effects with Other Oils: When mixed with carrier oils like rosehip or jojoba, Vitamin E becomes even more effective. It helps to stabilise these oils and enhances their individual benefits, creating a comprehensive treatment for a variety of skin concerns.
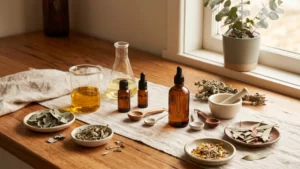
What You Need
To create a high-quality DIY vitamin E oil serum, you will need a few key ingredients and some basic equipment. Using premium, cold-pressed oils will ensure that your serum is packed with the maximum amount of nutrients for your skin.
- 1 teaspoon Pure Vitamin E Oil (Tocopherol)
- 30ml (1 oz) Organic Rosehip Seed Oil
- 30ml (1 oz) Golden Jojoba Oil
- 5-10 drops Frankincense Essential Oil (optional, for extra healing)
- A 60ml (2 oz) dark glass dropper bottle
- A small stainless steel or glass funnel
- Isopropyl alcohol (for sterilising your equipment)
Step-by-Step Recipe
Follow these simple steps to blend your own DIY vitamin E oil serum. Precision and cleanliness are key when formulating your own skincare at home to ensure a safe and effective product.
- Sterilise Your Workspace and Equipment: Before you begin, thoroughly clean your glass bottle, funnel, and any measuring tools with isopropyl alcohol. Allow them to air dry completely. This step is vital to prevent any bacteria from contaminating your serum.
- Measure Your Carrier Oils: Using your funnel, pour 30ml of rosehip seed oil and 30ml of jojoba oil directly into the glass dropper bottle. Rosehip oil is fantastic for scars, while jojoba oil mimics the skin’s natural sebum, making it an ideal base for any face oil.
- Add the Vitamin E Oil: Carefully measure one teaspoon of pure Vitamin E oil and add it to the bottle. Since Vitamin E is very thick, you may need to use a small spatula or the end of a clean spoon to ensure you get all of it into the mixture.
- Incorporate Essential Oils (Optional): If you are using frankincense or lavender essential oil, add 5 to 10 drops now. These oils provide a lovely scent and offer additional skin-soothing benefits, but they are not strictly necessary for the serum to work.
- Seal and Combine: Secure the dropper cap onto the bottle tightly. Gently roll the bottle between your palms for about 30 seconds to combine all the oils. Avoid shaking too vigorously, as this can introduce unnecessary air bubbles into the serum.
- Label and Store: Create a label for your bottle with the name of the serum and the date it was made. Store your DIY vitamin E oil serum in a cool, dark place away from direct sunlight to preserve the potency of the ingredients.
Tips for Best Results
To get the most out of your DIY vitamin E oil serum, how you apply it is just as important as the ingredients themselves. Here are some professional tips to help you achieve the best possible outcome for your scars and dark spots:
- Apply to Damp Skin: For maximum absorption, apply a few drops of your serum to slightly damp skin after cleansing. This helps the oils penetrate deeper and locks in the moisture from your toner or water.
- Consistency is Key: Natural remedies take time to work. You should use your serum consistently every night for at least 4 to 8 weeks before you expect to see a significant difference in the appearance of dark spots or scars. Patience and persistence are your best friends in DIY skincare.
- Use as a Night Treatment: Because this serum is quite rich, it is best used as the final step in your evening skincare routine. This allows the oils to work their magic while your body is in its natural repair mode during sleep.
- Don’t Forget the Sunscreen: While Vitamin E helps repair sun damage, using oils on your skin can sometimes increase sensitivity to the sun. Always apply a broad-spectrum SPF during the day to protect your skin and prevent new dark spots from forming.
Safety and Patch Testing
While Vitamin E is generally safe for most people, it is a concentrated ingredient that can cause reactions in some individuals. Before applying your DIY vitamin E oil serum to your entire face, it is essential to perform a patch test. Apply a small amount of the serum to the inside of your forearm and wait 24 to 48 hours to check for any redness, itching, or irritation. If you have very oily or active acne-prone skin, be mindful that Vitamin E is a heavier oil and may be comedogenic for some skin types. Always consult with a dermatologist if you have concerns about specific skin conditions.
Frequently Asked Questions
Can I use pure Vitamin E oil directly on my face without diluting it?
While you can, it is generally not recommended. Pure Vitamin E oil is extremely thick and sticky, making it difficult to spread evenly. Furthermore, it can be quite sensitising for some people when used at 100% concentration. Diluting it in carrier oils like jojoba or rosehip makes it much easier to apply and reduces the risk of irritation while still providing all the benefits.
How long will my DIY vitamin E oil serum last?
When stored correctly in a cool, dark place, your serum should remain fresh for about 6 to 9 months. Vitamin E actually acts as a mild antioxidant for the other oils, helping to extend their shelf life. However, if you notice any change in the smell (a rancid or “off” odour) or a significant change in colour, it is time to discard the batch and make a fresh one.
Will this serum help with old scars or just new ones?
Vitamin E is most effective on newer scars that are still in the active healing phase. However, it can still provide benefits for older scars by improving the overall hydration and elasticity of the surrounding skin, which can make them appear softer and less noticeable over time. For very deep or old scars, you may want to combine this serum with other treatments like gentle exfoliation.
Conclusion
Creating your own DIY vitamin E oil serum is an empowering way to take control of your skincare routine using simple, natural, and effective ingredients. By blending the antioxidant power of Vitamin E with nourishing carrier oils like rosehip and jojoba, you are providing your skin with the ultimate toolkit for repair and rejuvenation. Remember that beautiful skin is a journey, not a destination, so be patient with yourself and enjoy the process of formulating your own beauty products. Give this recipe a try tonight, and start your path toward a more radiant, even-toned complexion that truly glows from within!
You May Also Like