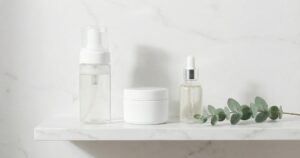
There’s a drawer in my bathroom that used to embarrass me. Not because it was messy (though it was), but because of what was in it. Six toners. Six. Some still more than half full, a couple barely touched, all of them promising something different. Tighter pores. Radiant skin. A “fresh, balanced complexion.” One of them smelled faintly of rubbing alcohol and optimism.
I’d kept buying them because I kept believing the labels. And I kept believing the labels because, well, the packaging was lovely and the marketing was convincing, and somewhere along the way I’d decided that the right toner was just one more purchase away.
Then one afternoon I sat on the edge of the bath and actually read the ingredient lists. All six of them. And that was the moment everything changed.
What I found was a lot of water. A lot of alcohol. Some synthetic fragrance. A handful of ingredients I couldn’t pronounce and couldn’t find a clear answer about online. And somewhere buried near the bottom, occasionally almost as an afterthought, something that might actually benefit my skin.
I poured the lot of them out that evening. And I haven’t bought a commercial toner since.
If that story sounds familiar, keep reading. Because the DIY toner I’ve landed on is genuinely better, and I say that as someone who spent years assuming “better” had to mean “more expensive.”
What Is a Toner Actually Supposed to Do?
Here’s the thing most brands won’t tell you: the original purpose of a toner is almost completely obsolete.
Toners were developed decades ago to remove the alkaline residue left behind by old-fashioned soap cleansers. Harsh soaps stripped the skin and threw off its pH, and an astringent toner was the fix. But modern cleansers, particularly the gentle, pH-balanced ones most of us use now, don’t leave that residue behind. The problem toners were designed to solve largely no longer exists.
So the industry reinvented the narrative. Now toners “minimise pores” (they don’t, since pores don’t open and close), “prep skin for better product absorption” (barely measurable in practice), and “rebalance pH” (which your skin regulates naturally within minutes of cleansing anyway).
None of this means a toner can’t be useful. A well-formulated one, with genuinely active, skin-loving ingredients, absolutely can add hydration, calm irritation, or deliver a hit of antioxidants. But what you’re typically buying from the shelf? A lot of it is water, alcohol to make it feel “clean,” synthetic fragrance to make it feel luxurious, and a preservative system to hold it all together. You’re paying a premium for the promise, not the performance.
Once I understood that, making my own stopped feeling like a DIY project and started feeling like the only logical choice.
Why Making Your Own Actually Makes Sense
I want to be honest here: I was sceptical at first. “Natural” doesn’t automatically mean effective, and I’ve seen enough DIY skincare recipes built around wishful thinking to know that ingredients matter.
But here’s what convinced me. When you make your own facial toner, three things happen that don’t happen at the shops:
The cost drops dramatically. A 100ml bottle of a mid-range commercial toner runs anywhere from $30 to $80. The ingredients for a comparable DIY version, which is often better quality, will cost you a few dollars per bottle once you’ve bought the basics. The maths are embarrassing for the brands.
Every ingredient earns its place. When I make a toner, I know what’s in it and exactly why. There’s no filler, no fragrance added purely for the sensory experience, no preservative cocktail to extend an 18-month shelf life. Just ingredients chosen for my skin, at concentrations that actually do something.
You can customise for what your skin actually needs. My skin in winter is completely different to my skin in summer. A commercial toner doesn’t know that. My DIY recipe does, because I can adjust it. If you’re also working with a damaged skin barrier, this level of ingredient control is genuinely invaluable.
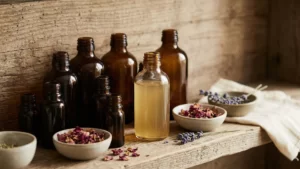
Three DIY Toner Recipes Worth Actually Trying
Below are the three recipes I rotate through, depending on how my skin’s behaving. Each one uses ingredients that are genuinely easy to source in Australia. I’ve noted where to find the key ones at the end of each recipe.
Before You Start
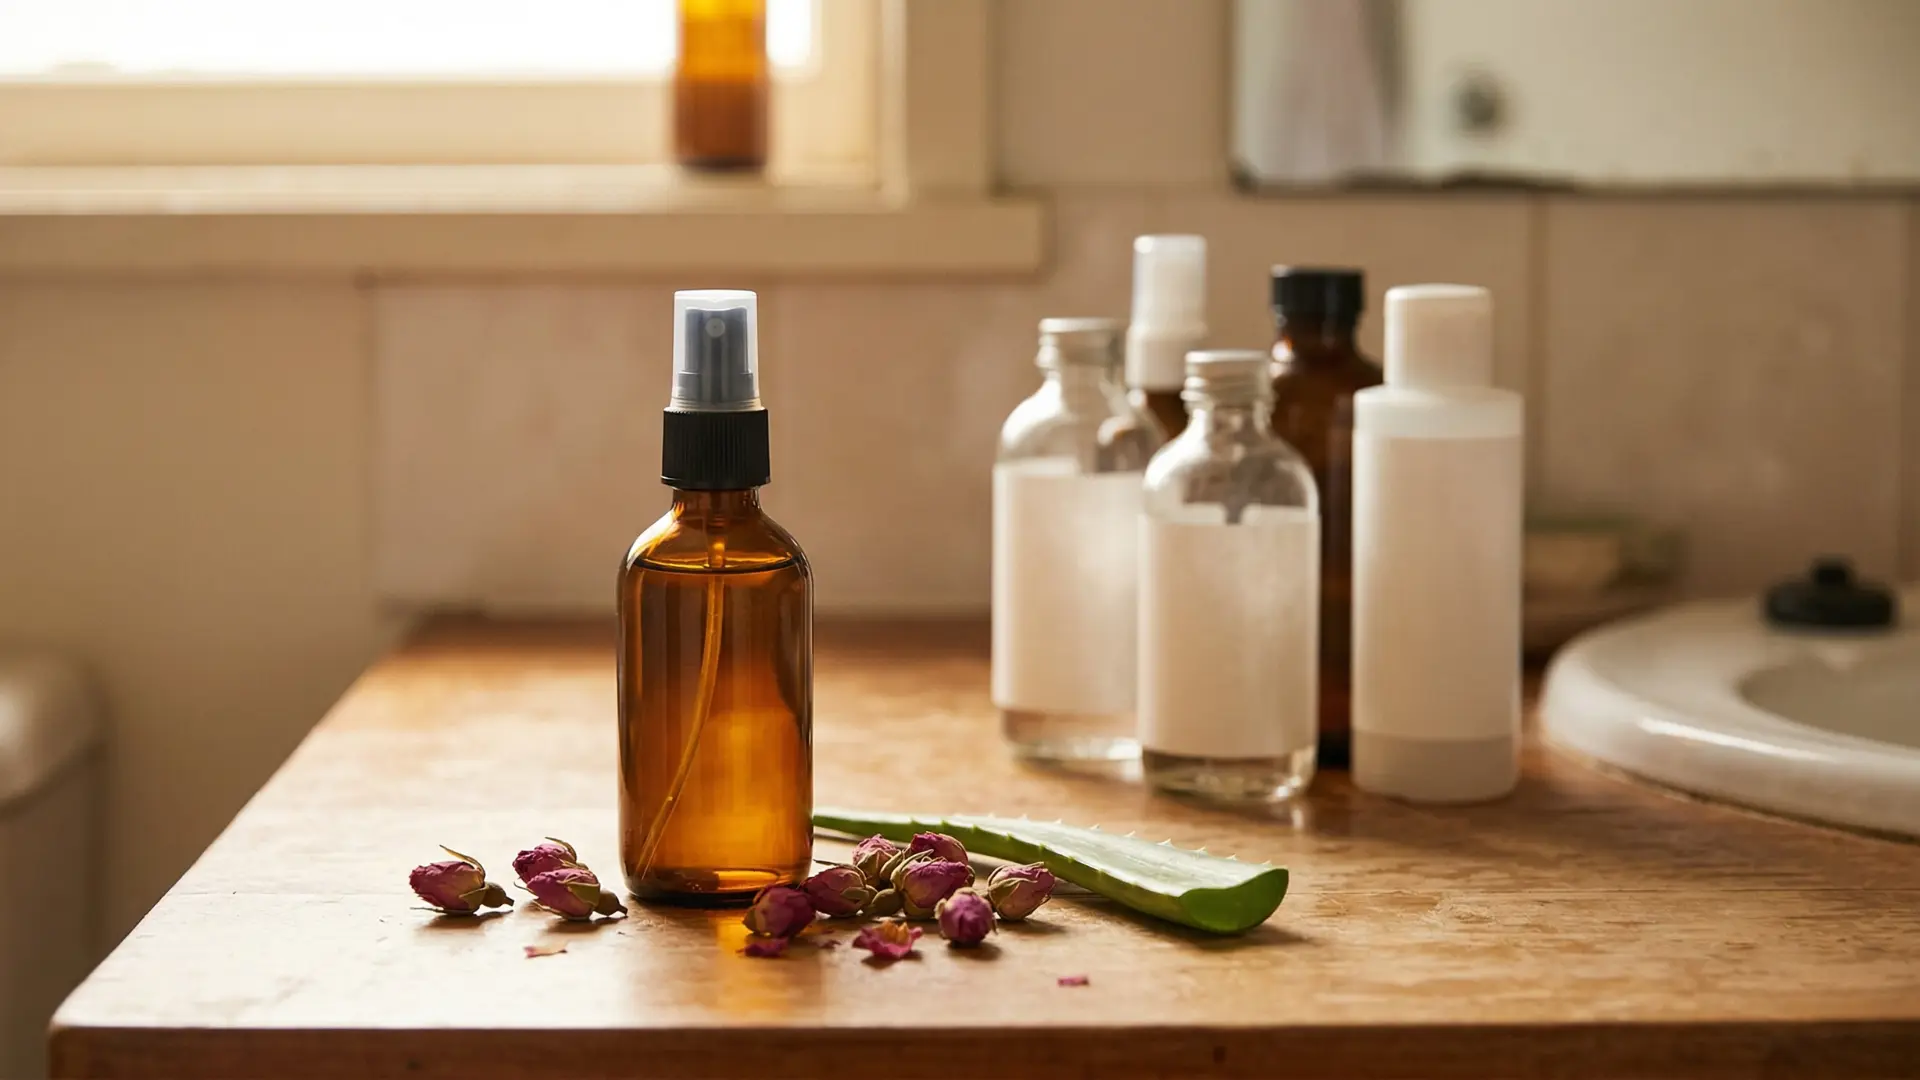
Always use distilled water (not tap, as the minerals and chlorine don’t play nicely with botanicals), sterilise your bottles with boiling water or isopropyl alcohol, and label each batch with the date you made it. These are water-based formulas with no added preservative, so treat them like fresh food.
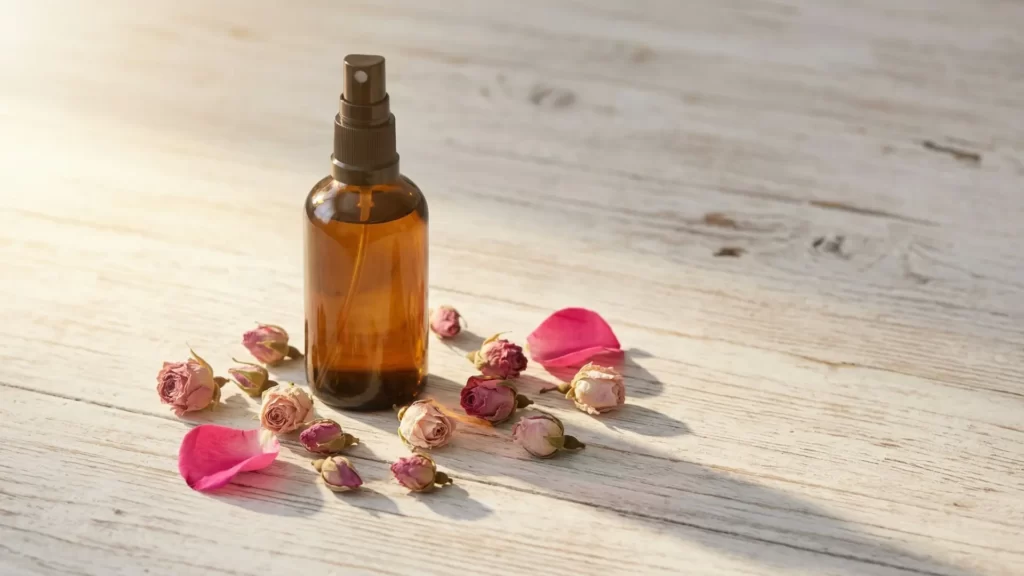
Recipe 1: The Rose Water & Witch Hazel Toner
Best for: Combination and oily skin, or anyone prone to congestion and enlarged pores.
- 60ml rose water (hydrosol): genuinely steam-distilled, not “rose-scented water.” Look for “Rosa damascena hydrosol” on the label. It’s mildly astringent, anti-inflammatory, and has a natural affinity with skin’s pH.
- 30ml alcohol-free witch hazel: the tannins in witch hazel are the real astringent workhorse here. Avoid anything with added isopropyl alcohol; it’s drying and counterproductive.
- 10ml aloe vera gel (pure): adds slip and hydration, and stops the formula feeling tight on the skin.
- 4 drops tea tree essential oil: optional, but useful if your skin is prone to breakouts. Always add essential oils to the witch hazel first to help disperse them.
Method: Combine witch hazel and tea tree oil in a clean bowl and stir. Add rose water and aloe vera gel. Pour into a sterilised 100ml glass spray bottle and shake gently. Use morning and evening on clean skin, either spritzed directly or applied with a cotton round.
Shelf life: 2 to 3 weeks at room temperature; up to 4 weeks refrigerated.
🌿 Australian Sourcing Tip
Rose hydrosol and alcohol-free witch hazel are both stocked by New Directions Australia (online). Pure aloe vera gel is available at most health food stores including Go Vita and Mrs Flannery’s.
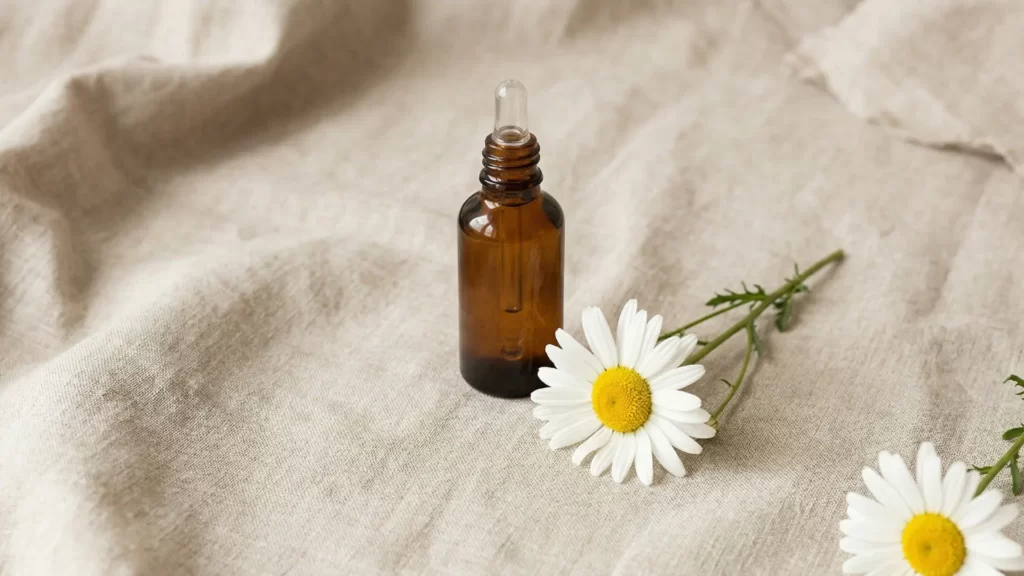
Recipe 2: The Chamomile & Aloe Toner
Best for: Sensitive, reactive, or easily irritated skin. Also lovely post-sun or post-waxing.
- 70ml chamomile hydrosol: this is the gentlest base you can use. Chamomile is naturally anti-inflammatory and calming, and the hydrosol form means you’re getting the actives without the irritation risk of the essential oil.
- 20ml aloe vera gel (pure): the hero ingredient for reactive skin. Cooling, healing, and genuinely effective at reducing redness.
- 10ml vegetable glycerin: a humectant that draws moisture to the skin’s surface. A little goes a long way; too much and the formula gets tacky.
- 2 drops lavender essential oil: optional. If your skin is very reactive, skip it. If it tolerates lavender well, it adds a lovely calming element.
Method: Mix glycerin and lavender oil together first (this helps the oil disperse more evenly). Add chamomile hydrosol and aloe vera gel. Transfer to a sterilised bottle. Shake before each use as glycerin can settle slightly.
Shelf life: 2 weeks at room temperature; up to 3 weeks refrigerated.
🌿 Australian Sourcing Tip
Chamomile hydrosol can be found through Escentials of Australia or New Directions. Vegetable glycerin is widely available in health food stores and online via Soap Supplies Australia.
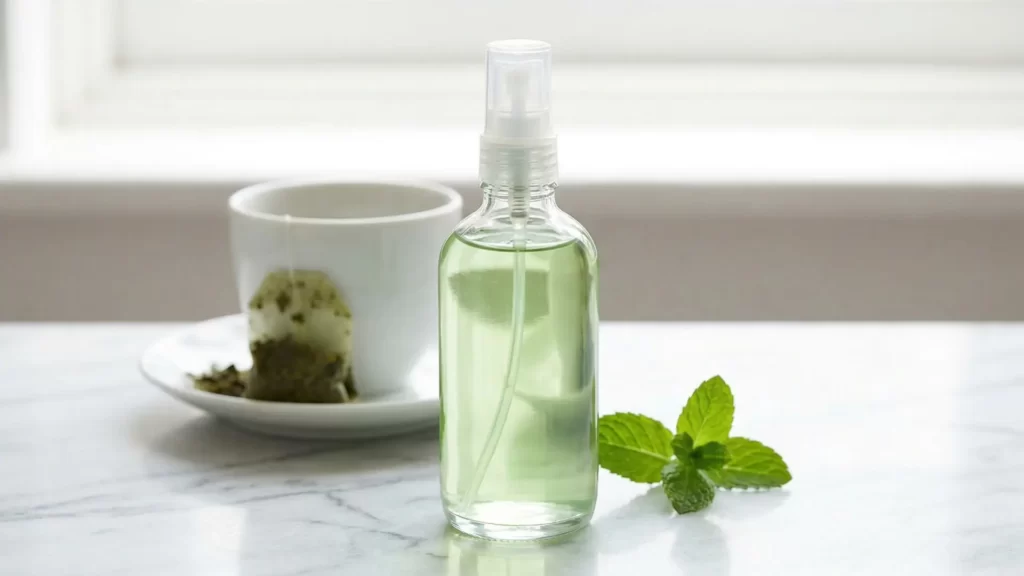
Recipe 3: The Green Tea & Glycerin Toner
Best for: Dry or mature skin that needs hydration and antioxidant support, not astringency.
- 60ml strong-brewed green tea (cooled completely): brew a proper cup, let it cool, and use it within 24 hours. Green tea is rich in polyphenols, which are antioxidants that help protect against environmental damage and support collagen integrity.
- 20ml rose water: adds a layer of hydration and a gentle pH-lowering effect.
- 15ml vegetable glycerin: the main humectant in this formula. Particularly valuable for dry skin types.
- 5ml vitamin E oil: adds antioxidant reinforcement and helps extend the formula’s freshness slightly. Break open a capsule if you don’t have the oil. It pairs beautifully with the right carrier oils if you’re building out a fuller routine alongside your toner.
Method: Brew green tea using one teabag or one teaspoon of loose leaf in 70ml of just-boiled distilled water. Steep for 5 minutes, then cool completely before using, as warm tea will affect your preservative-free formula. Combine all ingredients in a sterilised bottle and shake well.
Shelf life: Because this uses brewed tea rather than a commercial hydrosol, it is more perishable. Use within 10 days and keep it in the fridge. When in doubt, make a fresh batch; it takes five minutes.
🌿 Australian Sourcing Tip
Any quality loose-leaf green tea works well; try your local farmers’ market or a tea specialist. Vitamin E oil capsules are available at Chemist Warehouse.
A Few Things I Wish Someone Had Told Me Earlier
Making your own DIY toner is genuinely simple, but there are a couple of things that make the difference between a formula that works and one that goes off in a week.
Patch test, every time. I know it feels unnecessary when you’re using three familiar ingredients. Do it anyway. Apply a small amount to your inner arm and wait 24 hours before using it on your face. Natural doesn’t mean hypoallergenic, and essential oils in particular can surprise you.
Your bottle matters more than you think. Dark glass, like amber or cobalt, is ideal because it protects botanical ingredients from light degradation. If you’re storing in the fridge, a small glass mist bottle works beautifully and adds a lovely sensory moment to your routine (cold mist on clean skin is genuinely one of the small joys of making your own).
Sterilisation is non-negotiable. Water-based formulas without preservatives are a bacteria-growing opportunity if you’re not careful. Wash your bottles, rinse with boiling water, and let them dry completely before filling. If you’re dealing with compromised or reactive skin, the same care applies as when managing a DIY eczema cream: hygiene is everything.
Write the date on the label. It sounds obvious. I still forget sometimes. A piece of masking tape and a marker takes five seconds and saves you from using something that’s turned.
The Drawer Looks Different Now
I still have a skincare drawer. But these days it has three small amber bottles in it, all labelled in my own handwriting, all made from ingredients I chose deliberately. I know what’s in every single one. I know why it’s there. And my skin, honestly, has never been more settled.
The switch to making my own DIY toner wasn’t dramatic. It didn’t happen overnight, and I didn’t throw everything out in a single righteous purge (well, mostly). But once I understood what I’d actually been buying, going back felt impossible.
Start with whichever recipe matches your skin type today. You probably already have most of the ingredients, or something close.
And if you find a combination that works brilliantly for your skin, I’d genuinely love to hear about it. Drop a comment below and share what you’ve landed on.
You May Also Like