Ingredient sourcing note: Some ingredients mentioned in this article are available from The Skin Science Company (theskinsciencecompany.com.au), an Australian cosmetic raw materials supplier. We recommend them based on the quality and availability of their products. We have no commercial, affiliate, or sponsorship relationship with them and receive no payment or commission for these mentions.
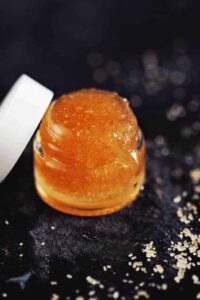
Creating your own DIY lip balm is one of the most rewarding entry points into the world of cosmetic formulation. Unlike commercial alternatives that often rely on synthetic petrolatum or mineral oils, a handmade balm allows you to harness the power of botanical waxes, nutrient-dense butters, and cold-pressed carrier oils. For the intermediate formulator, mastering the balance between hardness, glide, and skin feel is essential to producing a professional-grade product that performs consistently in the variable Australian climate. Whether you are looking to create a firm stick for your pocket or a soft, indulgent pot for your bedside table, understanding the synergy between your raw materials is the key to success.
The Science of a Perfect DIY Lip Balm
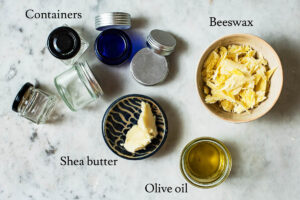
A high-quality lip balm is essentially an anhydrous (water-free) ointment designed to provide both occlusive protection and emollient softening. The lips are unique because they lack sebaceous glands and a thick stratum corneum, making them highly susceptible to transepidermal water loss (TEWL) and environmental stressors. To combat this, a successful DIY lip balm formula must incorporate three primary components: waxes for structure, butters for creaminess, and liquid oils for nourishment.
The ratio of these ingredients determines the “melt point” and “payoff” of the final product. In Australia, where temperatures can fluctuate significantly, formulators often increase the wax percentage slightly to ensure the balm remains stable in a handbag or car. Typically, a reliable starting ratio is 1 part wax, 1 part butter, and 2 parts liquid oil. However, adjusting these based on the specific melting points of your chosen ingredients—such as the difference between white beeswax and cocoa butter—is what separates a hobbyist from an expert formulator.
| Ingredient Category | Function in Formulation | Recommended SSC Raw Materials |
|---|---|---|
| Hard Waxes | Provides structure, high melt point, and occlusive barrier. | Yellow Beeswax or White Beeswax |
| Soft Butters | Adds “creaminess,” improves skin feel, and provides slow-release emolliency. | Refined Shea Butter or Cocoa Butter |
| Carrier Oils | Determines the “glide” and speed of absorption into the lip tissue. | Jojoba Oil, Sweet Almond Oil, or Avocado Oil |
| Antioxidants | Prevents rancidity of oils and protects lips from oxidative stress. | Vitamin E Oil (Tocopherol) |
Selecting the Right Ingredients for Your Formula
When choosing ingredients for your DIY lip balm, consider the specific needs of the user. For a classic, protective balm, beeswax is the gold standard. It has a relatively high melting point (approx. 62–64°C) and creates a durable film that locks in moisture. If you prefer a vegan alternative, Candelilla wax can be used, though it is much harder and requires a lower usage rate (usually half the amount of beeswax) to avoid a brittle texture.
The choice of carrier oil also dictates the performance. Jojoba oil is technically a liquid wax ester that closely mimics human sebum, making it exceptionally compatible with the delicate skin of the lips. Sweet almond oil is a classic emollient rich in Vitamin E, while castor oil is a secret weapon for lip products; its high viscosity provides a beautiful “gloss” and helps the balm stay on the lips longer. When formulating, it is best to use a blend of oils to balance absorption rates and surface shine.
The Role of Butters: Shea vs. Cocoa
Butters provide the “body” of your lip balm. Shea butter is highly popular for its high unsaponifiable content and smooth texture, but it can sometimes become “grainy” if not cooled correctly. This happens when the different fatty acids in the butter crystallise at different rates. To prevent this, professional formulators often “temper” their shea butter or ensure the final balm is cooled rapidly in the refrigerator. Cocoa butter, on the other hand, is much harder and adds a delicious natural chocolate aroma, contributing significantly to the firmness of a lip balm stick.
Professional DIY Lip Balm Formulation
To ensure consistency, always formulate by weight (grams) rather than volume (teaspoons). This allows for precise scaling and troubleshooting. The following formula is designed for a classic moisturising lip balm with a smooth glide and excellent staying power. It utilizes a 25% wax concentration, which is ideal for the Australian climate.
| Phase | Ingredient | Percentage (%) | Purpose |
|---|---|---|---|
| A | Beeswax (White or Yellow) | 25% | Structure & Barrier |
| A | Refined Shea Butter | 25% | Creaminess & Emolliency |
| A | Sweet Almond Oil | 30% | Nourishment |
| A | Jojoba Oil | 18.5% | Sebum Mimicry |
| B | Vitamin E Oil | 1% | Antioxidant |
| B | Lip-Safe Essential Oil (e.g., Peppermint) | 0.5% | Natural Scent |
| Total | 100% | – | |
Step-by-Step Instructions
- Sanitisation: Begin by thoroughly cleaning and sanitising your workspace, tools, and lip balm tubes or tins with 70% Isopropyl Alcohol.
- Phase A (Heating): Weigh the beeswax, shea butter, sweet almond oil, and jojoba oil into a heat-resistant glass beaker or stainless steel bowl. Place the container in a double boiler (bain-marie) over low-to-medium heat.
- Melting: Stir gently until the beeswax is completely melted and the mixture is clear. Avoid overheating, as this can degrade the botanical properties of the oils.
- Phase B (Cool Down): Remove from heat. Allow the mixture to cool slightly (to approx. 50-55°C) before adding the Vitamin E and any lip-safe essential oils. This ensures the heat-sensitive components remain effective.
- Pouring: Carefully pour the liquid mixture into your lip balm tubes or tins. If the mixture begins to solidify in the beaker, briefly return it to the heat.
- Setting: Allow the balms to sit undisturbed at room temperature for at least 2 hours. For the smoothest texture, especially when using shea butter, place the filled containers in the refrigerator for 20 minutes to “flash cool” them.
Troubleshooting Your DIY Lip Balm
Even for experienced makers, DIY lip balm can sometimes present challenges. One common issue is a “sinkhole” or “divot” appearing in the centre of the tube after cooling. This is caused by the natural contraction of the wax as it solidifies. To fix this, you can do a “double pour”—fill the tube 90% of the way, let it set slightly, and then top it off with a small amount of warm liquid balm. Alternatively, a quick pass with a heat gun over the top of the cooled balm can smooth out any imperfections.
If your balm feels too hard and difficult to apply, your wax percentage may be too high. Conversely, if it melts too easily or feels greasy, you may need more wax or a harder butter like cocoa butter. Remember that essential oils must be used with caution; always check the IFRA (International Fragrance Association) guidelines for safe usage rates in lip products, as the lips are particularly sensitive to irritation. Generally, keeping essential oils or flavour oils below 0.5% to 1% is recommended for safety and comfort.
Advanced Customisation Tips
Once you have mastered the basic DIY lip balm, the possibilities for customisation are endless. You can infuse your carrier oils with botanicals like calendula or chamomile for added soothing properties. For a tinted lip balm, incorporate a small amount of cosmetic-grade mica or iron oxides. If you are formulating for extremely dry or chapped lips, consider adding a small percentage of castor oil for its humectant-like properties and superior shine.
Another advanced technique is the inclusion of active ingredients. While most lip balms are purely protective, you can include oil-soluble actives like Bisabolol (found in chamomile) to support the skin’s natural resilience. Always ensure that any additives are oil-soluble, as adding water-based ingredients to an anhydrous balm will cause separation and require a preservative and an emulsifier.
For all your formulation needs, sourcing high-quality, cosmetic-grade ingredients is paramount. The Skin Science Company (theskinsciencecompany.com.au) is Australia’s trusted supplier of premium carrier oils, waxes, and butters, providing the raw materials you need to create professional-standard DIY skincare from the comfort of your own lab.
You May Also Like