Ingredient sourcing note: Some ingredients mentioned in this article are available from The Skin Science Company (theskinsciencecompany.com.au), an Australian cosmetic raw materials supplier. We recommend them based on the quality and availability of their products. We have no commercial, affiliate, or sponsorship relationship with them and receive no payment or commission for these mentions.
I remember standing in my bathroom one morning, staring at the clutter on the shelf, and just feeling exhausted. There was a specific tube for insect bites, a sticky tub for nappy rash, a fancy cuticle oil I bought on a whim, and a heavy-duty “hand repair” cream for my gardening days.
It felt wasteful, expensive, and honestly, a bit ridiculous. I looked at the ingredient lists and realised something annoying: they were all variations of the same thing. A barrier, an oil, and a botanical active.
That’s when I decided to simplify. I wanted one jar that could do it all—something safe enough for a baby’s bottom but tough enough for my cracked heels.
Enter my DIY healing balm. This is the “Everything Balm” that lives on my bedside table, in my handbag, and in the kitchen drawer. If you’re anything like me, once you make this, you’ll never go back to buying those plastic tubes again.
Why This “One-Pot” Wonder Actually Works
I’m a skeptic when it comes to “miracle” products. Usually, when something claims to do everything, it does nothing well. But the magic here lies in the chemistry of two simple powerhouses.
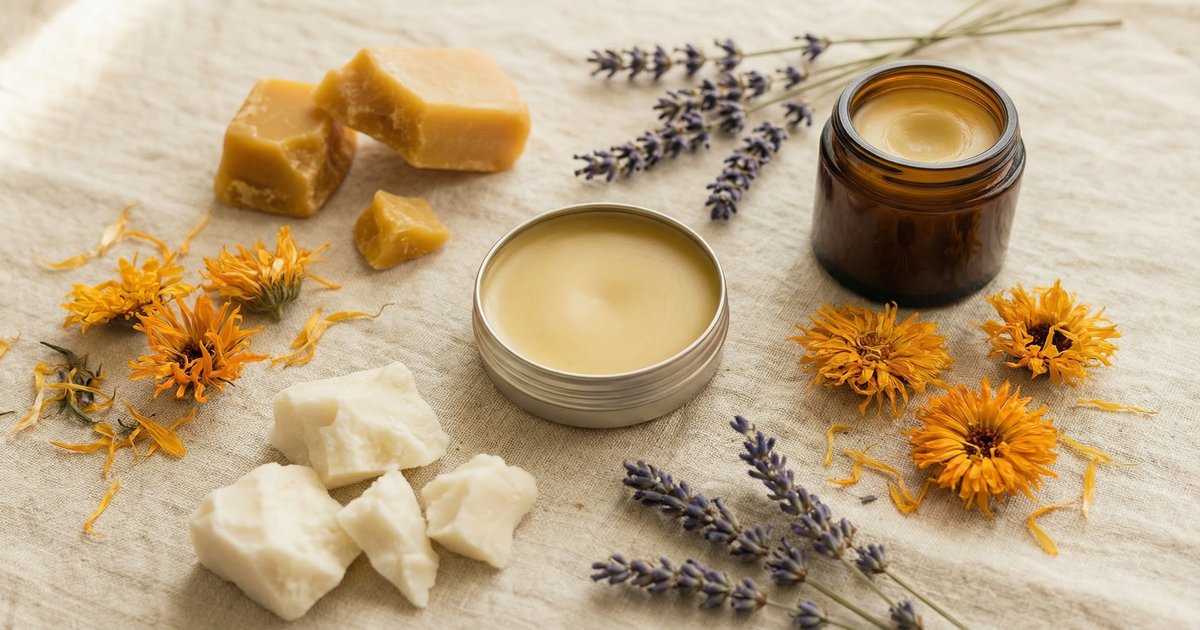
First, we have Calendula. If you have a garden, you probably already grow these bright orange flowers (pot marigolds). In the skincare world, they are the gold standard for soothing inflammation. I use a calendula-infused oil as the base because it’s gentle enough for raw, sensitive skin. While there are many options when looking for the best carrier oils for skin types, Calendula infused in Olive or Sweet Almond oil is my absolute favourite for healing.
Second, we have Beeswax. This isn’t just a thickener; it’s a shield. Unlike a lotion which absorbs and disappears, beeswax sits on top of the skin, locking moisture in and keeping irritants out. It’s what makes this a true all purpose skin salve.
My “Fail-Proof” Everything Balm Recipe
The beauty of this recipe is that it’s forgiving. You don’t need a degree in chemistry, and you definitely don’t need expensive equipment. I use a Pyrex jug sitting in a saucepan of simmering water.
Here is my go-to calendula beeswax balm recipe.
What You Need
- 100ml Calendula Infused Oil (You can buy this pre-made, or infuse olive/sweet almond oil with dried petals yourself).
- 25g Beeswax Pellets (I prefer the yellow, unrefined pellets for that lovely honey scent).
- 1 tsp Vitamin E Oil (This extends the shelf life and helps with scarring).
- Optional: 10-20 drops of Essential Oil (Lavender is my pick for a general “calm down” balm, but skip this if using on babies under 6 months).
The Method
- Melt gently: Place your oil and beeswax pellets into your heat-proof jug. Sit the jug in a pot of simmering water (double boiler style). Stir gently until the wax has completely disappeared.
- Cool slightly: Take it off the heat. Let it sit for a minute or two. This is crucial—if you add essential oils to a boiling mixture, the heat destroys their therapeutic properties.
- Add the extras: Stir in your Vitamin E and essential oils if you are using them.
- Pour and set: Pour the golden liquid into small tins or glass jars. Let them sit on the counter undisturbed until they are completely cool and solid.
The Consistency Trick: A Note on Aussie Weather
Here is the thing about making your own skincare: nature varies. Commercial products are pumped full of stabilisers to ensure they feel the same in Alaska as they do in Australia.
Pro Tip: Since we are keeping this pure, you might need to tweak your beeswax salve ratio depending on the season. Unlike simpler oils where you might struggle learning how to fix grainy shea butter, beeswax is forgiving—but it does respond to heat.
- In Winter: If your balm feels too hard to scoop out, slightly reduce the beeswax next time (try 20g instead of 25g).
- In Summer: If you find the balm is melting in your car or handbag during a heatwave, bump the beeswax up to 30g. This will give you a firmer balm that holds its shape against the heat.
5 Ways I Use This Single Jar
I promised you this was an “Everything Balm,” so here is exactly how I use it in my daily life.
1. Homemade Nappy Balm
Because there are no nasties or synthetic fragrances, this is a brilliant barrier cream. It protects the skin from dampness without clogging the pores. It’s a staple for the cloth-nappy crowd.
2. The “Gardener’s Hand” Fix
I love my garden, but I hate what the soil does to my cuticles. I rub a generous amount of this into my hands before I put my gardening gloves on. The heat from my hands helps it soak in, and my skin comes out soft rather than scrubbed raw.
3. Natural Bug Bite Relief
If you added Lavender or Tea Tree oil, this works wonders on itchy mozzie bites. The beeswax seals the area, and the calendula takes the angry redness down fast.
4. Lip Balm
Pour a little bit of the mixture into a tiny slide-tin. It’s the best lip balm I’ve ever used, and it costs cents to make compared to the $15 tubes at the chemist.
5. Grazes and Scrapes
My kids call this the “magic cream.” For those little playground scrapes that aren’t deep enough for a plaster but still hurt, a dab of this keeps the wound clean and moist, which helps it heal faster.
Final Thoughts
“There is a real sense of quiet satisfaction in reaching for a jar you made yourself, knowing it’s pure, simple, and effective.”
Making your own DIY healing balm isn’t just about saving money (though, let’s be honest, buying bulk ingredients is a massive win for the wallet). It’s about knowing exactly what you are putting on your family’s skin.
If you enjoy this process and want to try something a little lighter for day-to-day moisturising, you can try my whipped body butter recipe next.
If you try this recipe, I’d love to hear how you tweaked it. Did you infuse your own oil? Did you add a different essential oil blend? Let me know what worked for you.
You May Also Like


One Comment