How to Make a DIY serum-scars/”>Vitamin C Serum at Home
If you are passionate about crafting your own skincare or looking to add a brightening boost to your routine, a DIY vitamin C serum is an excellent place to start. Vitamin C, particularly in the form of L-Ascorbic Acid, is a powerful antioxidant well known for its ability to brighten skin, even out skin tone, and support collagen production. Making your own serum at home not only allows you to customise the concentration and ingredients but also ensures freshness and potency. In this guide, we will walk you through the essentials of creating a stable and effective DIY vitamin C serum, including a practical recipe, sourcing tips, and advice on safety and storage.
Understanding Vitamin C and Its Benefits in Skincare
Vitamin C is a water-soluble vitamin that serves as a potent antioxidant in skincare formulations. The most researched and effective form for topical use is L-Ascorbic Acid. It helps protect skin cells from free radical damage caused by UV exposure and pollution, promotes collagen synthesis which supports skin firmness, and reduces the appearance of pigmentation and dullness. Because of these properties, vitamin C serums have become a staple for anyone aiming for brighter, smoother, and more youthful-looking skin.
However, L-Ascorbic Acid is notoriously unstable. It oxidises quickly when exposed to air, light, or high pH, which can reduce its effectiveness and even lead to skin irritation. This makes formulating a DIY vitamin C serum a bit of a challenge, but with proper techniques and ingredients, you can create a potent and stable product at home.
Key Considerations When Making Your DIY Vitamin C Serum
Choosing the Right Concentration
Vitamin C serums usually range from 5% to 20% L-Ascorbic Acid. Beginners should start with 10% or less to minimise potential irritation, especially if you have sensitive skin. For more experienced formulators, concentrations up to 15-20% are effective but should be tested carefully.
Maintaining the Correct pH
L-Ascorbic Acid is most stable and effective at a pH below 3.5. This low pH ensures maximum penetration into the skin. However, too low a pH can cause stinging or irritation for some users. Balancing potency and comfort is key.
Using Stabilising Ingredients
To enhance stability and skin benefits, DIY vitamin C serums often include antioxidants like Vitamin E (Tocopherol) and ferulic acid. These antioxidants work synergistically with vitamin C to protect it from oxidation and improve efficacy. Additionally, including soothing humectants such as glycerin can improve skin hydration and reduce irritation risk.
DIY Vitamin C Serum Recipe: Step-by-Step Guide
Below is a simple and effective recipe for a 10% L-Ascorbic Acid serum that balances potency, stability, and skin comfort. This recipe yields approximately 30 ml of serum.
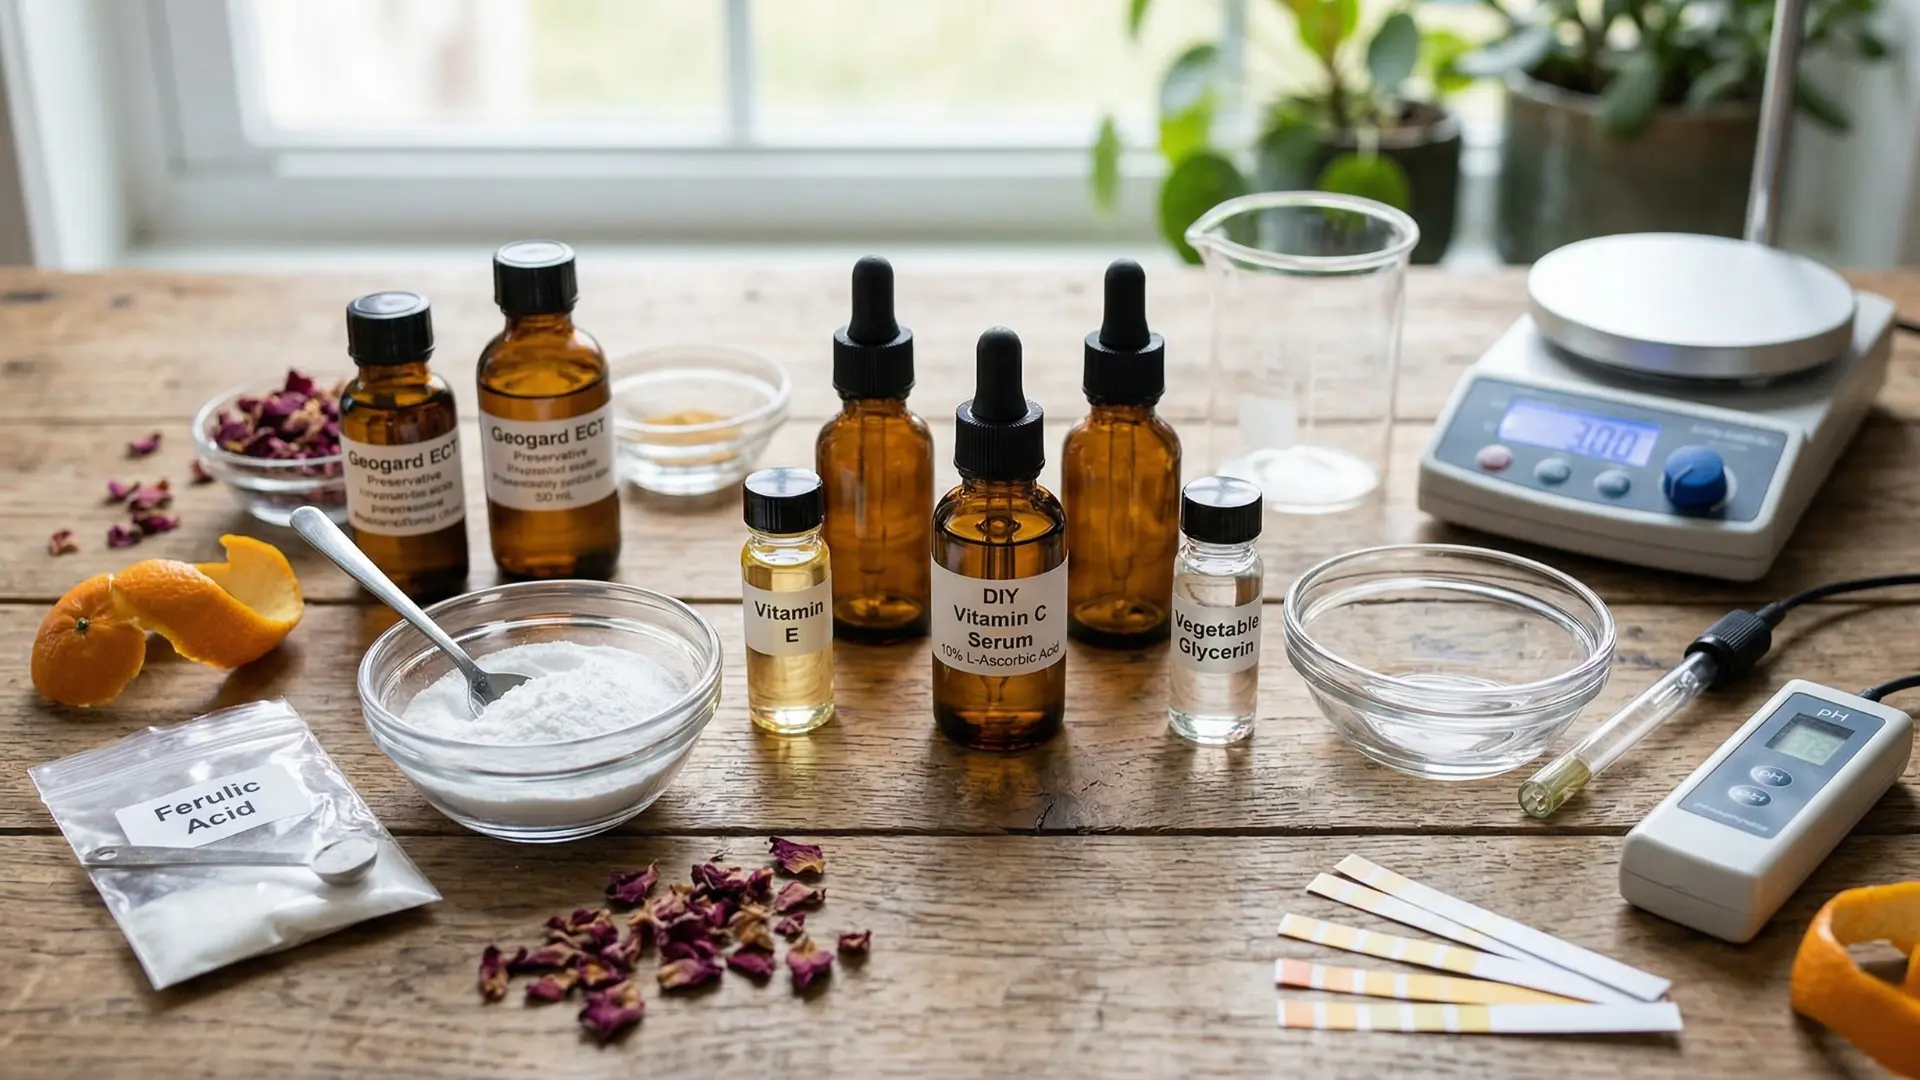
Ingredients
- 3 g L-Ascorbic Acid powder (10% concentration)
- 25 ml distilled water or hydrosol (rose water or orange blossom water works well)
- 1.5 ml Vegetable Glycerin (humectant)
- 0.5 ml Vitamin E Oil (Tocopherol)
- 0.1 g Ferulic Acid (optional but recommended for enhanced stability)
- Preservative suitable for water-based serums (e.g. Geogard ECT) – follow supplier recommended usage rate (usually 0.5-1%)
Equipment
- Small glass beaker or bowl
- Magnetic stirrer or small whisk
- pH meter or pH strips (preferably pH meter for accuracy)
- Dark glass dropper bottle (30 ml)
- Digital scale (accurate to 0.01 g)
Instructions
- Dissolve the L-Ascorbic Acid: Measure 25 ml of distilled water or hydrosol into your beaker. Slowly add 3 g of L-Ascorbic Acid powder while stirring continuously until fully dissolved. This may take a few minutes.
- Add Ferulic Acid: If using ferulic acid, gently heat a small amount of distilled water (around 5 ml) to about 40°C and dissolve 0.1 g ferulic acid in it, then add to the main solution. Stir thoroughly.
- Add Glycerin and Vitamin E: Add 1.5 ml glycerin and 0.5 ml vitamin E oil to the mixture. Stir well to combine. These ingredients add moisturising and antioxidant benefits.
- Check and Adjust pH: Use your pH meter to check the serum pH. It should be between 2.8 and 3.5. If the pH is too high, add a small amount of diluted citric acid solution to lower it. If it is too low and causes irritation, you may dilute the serum slightly with more distilled water or hydrosol.
- Add Preservative: Add the recommended amount of preservative according to the supplier’s guidelines. This is crucial to prevent microbial growth since the serum contains water.
- Transfer and Store: Pour the serum into a dark glass dropper bottle to protect from light. Label your bottle with the date and concentration.
Usage tip: Apply a few drops of your DIY vitamin C serum to clean, dry skin each morning before moisturiser and sunscreen. Always patch test new products before full-face application.
Ingredient Sourcing Tips for Your DIY Vitamin C Serum
Sourcing high-quality ingredients is essential to ensure your DIY vitamin C serum is safe, effective, and stable. You can find L-Ascorbic Acid powder and other cosmetic raw materials from reputable Australian cosmetic ingredient suppliers. These suppliers often provide certificate of analysis (CoA) and safety data sheets, which can help you verify purity and suitability.
Look for cosmetic- or pharmaceutical-grade L-Ascorbic Acid rather than food-grade, as the latter may contain impurities unsuitable for skin application. Similarly, choose antioxidants like Vitamin E oil and ferulic acid from trusted suppliers. For hydrosols, opt for organic or naturally distilled varieties free from synthetic additives.
Many Australian suppliers also stock preservatives compatible with water-based formulations. Geogard ECT (a combination of benzyl alcohol, salicylic acid, glycerin, and sorbic acid) is a popular broad-spectrum preservative that works well in vitamin C serums.
Safety and Storage Considerations
While vitamin C serums are generally safe, there are some important safety considerations to keep in mind when making and using your DIY vitamin C serum.
Patch Testing and Skin Sensitivity
Because L-Ascorbic Acid is acidic, it can cause mild irritation or stinging, especially at higher concentrations or for sensitive skin types. Always perform a patch test by applying a small amount of serum on your inner forearm or behind your ear and wait 24 hours to check for any adverse reaction.
Storage to Maximise Stability
Vitamin C oxidises quickly when exposed to air, light, and heat, which reduces its effectiveness and can turn the serum yellow or brown. To slow oxidation, store your serum in a cool, dark place, ideally in a fridge. Use a dark glass bottle with a tight-fitting dropper or cap to minimise air exposure.
Make small batches to ensure you use the serum within 2 to 4 weeks. If you notice changes in colour, smell, or texture, it is best to discard the batch and make a fresh one.
Preservative Use
Since the serum contains water, it is crucial to include a preservative to prevent microbial contamination. Never skip this step, as bacteria and mould can proliferate quickly in water-based products, posing health risks.
Conclusion
Creating a DIY vitamin C serum at home is a rewarding way to incorporate a potent antioxidant into your skincare regimen. By understanding the importance of concentration, pH, and stabilising ingredients, you can formulate a serum that delivers brightening and anti-ageing benefits safely and effectively. Remember to source high-quality ingredients from reliable Australian suppliers, patch test new formulations, and store your serum properly to preserve its potency.
We invite you to try this recipe and share your results with the diyskincaretips.com community. If you enjoyed this guide, explore our other serums and active ingredient recipes to continue your journey in home skincare formulation.
You May Also Like