Unlock Radiance with a DIY Pumpkin Enzyme Mask for Dull and Congested Skin
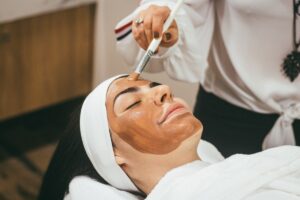
Is your skincare routine feeling a little stale? Dull, congested skin can make even the most dedicated skincare lover question their approach. What if the secret to a glowing complexion was sitting right in your kitchen? Enter the DIY pumpkin enzyme mask, a natural, gentle exfoliant packed with the power to refresh tired skin and clear congestion without harsh chemicals. Ready to turn back the clock on lacklustre skin and reveal that radiant glow? Let’s dive into why pumpkin enzymes are your new skincare hero and how to whip up your own mask at home.
Why Choose a DIY Pumpkin Enzyme Mask?
Pumpkin is far more than a seasonal treat; it’s a powerhouse of skin-loving nutrients. Rich in enzymes, vitamins A, C, and E, plus alpha hydroxy acids (AHAs), pumpkin naturally exfoliates dead skin cells, unclogs pores, and promotes cell turnover. This makes it ideal for dull, congested skin that needs a gentle but effective boost.
Unlike abrasive scrubs, enzyme masks dissolve impurities and slough off dead cells without irritation, making them suitable for all skin types, including sensitive skin. Plus, making a DIY pumpkin enzyme mask means you control every ingredient, avoiding unwanted preservatives or irritants.
Ingredients for Your DIY Pumpkin Enzyme Mask
Below is a simple, effective recipe designed to exfoliate and revitalise your complexion. The percentages are based on a total batch size of 100 grams for easy scaling.
- Fresh pumpkin puree: 50g (50%) – the base, rich in natural enzymes and AHAs
- Greek yoghurt: 30g (30%) – provides lactic acid for gentle exfoliation and soothes the skin
- Honey: 10g (10%) – a natural humectant and antibacterial agent to nourish and calm skin
- Oat flour: 8g (8%) – offers gentle physical exfoliation and anti-inflammatory benefits
- serum-scars/”>Vitamin E oil: 2g (2%) – an antioxidant that helps protect and nourish the skin
Step-by-Step Method: How to Make Your Pumpkin Enzyme Mask
- Prepare your pumpkin puree: Start by steaming or roasting fresh pumpkin until soft. Blend until smooth and allow to cool completely.
- Combine ingredients: In a clean mixing bowl, add 50g of pumpkin puree, 30g Greek yoghurt, and 10g honey. Stir to combine thoroughly.
- Add dry ingredients: Gradually sift in 8g oat flour, mixing gently to avoid lumps.
- Incorporate vitamin E oil: Add 2g vitamin E oil and blend evenly into the mixture.
- Test consistency: Your mask should be thick enough to apply easily without dripping. If too thin, add a little more oat flour; if too thick, a small splash of yoghurt or water will help.
- Application: Apply a thin, even layer to cleansed skin, avoiding the eye area. Leave on for 10-15 minutes until it starts to dry but is not completely set.
- Rinse off: Use lukewarm water and gentle circular motions to remove the mask, then pat skin dry.
- Follow up: Finish with your favourite moisturiser and sunscreen if using during the day.
Safety Precautions and Storage Tips for Your DIY Pumpkin Enzyme Mask
While this mask is made from natural ingredients, it’s important to be cautious:
- Patch test: Always do a patch test on a small skin area 24 hours before your first full-face application to check for sensitivity or allergic reaction.
- Avoid broken skin: Do not apply the mask on irritated, broken, or sunburnt skin to prevent further irritation.
- Sun sensitivity: Pumpkin contains AHAs which can increase your skin’s sensitivity to the sun. Always apply sunscreen after using this mask, especially if used during the day.
- Storage: Because this mask contains fresh ingredients with no preservatives, store it in an airtight container in the fridge. Use within 3-4 days for best results.
- Hygiene: Use clean tools and hands when preparing and applying to avoid contamination.
FAQ – Your DIY Pumpkin Enzyme Mask Questions Answered
1. How often can I use a DIY pumpkin enzyme mask?
For most skin types, using this mask 1-2 times per week is sufficient to brighten and clear dull skin without over-exfoliating. Sensitive skin types should start with once a week and observe how their skin responds.
2. Can I substitute Greek yoghurt with something else?
Yes, you can swap Greek yoghurt for plain natural yoghurt or aloe vera gel if you prefer a dairy-free option. Keep in mind the exfoliating lactic acid content will be slightly reduced.
3. Will this mask help with acne-prone skin?
Absolutely. The pumpkin enzymes gently exfoliate dead skin cells and unclog pores, while honey’s antibacterial properties help soothe and prevent breakouts. However, if you have severe acne, consult a dermatologist before use.
4. Can I use canned pumpkin puree instead of fresh pumpkin?
Fresh pumpkin puree is preferred because it retains more enzyme activity. Canned puree is typically cooked and may have reduced enzymatic potency, but it can be used in a pinch.
5. How should I store leftovers safely?
Store any leftover mask in a sealed glass jar or container in the refrigerator. Use within 3-4 days to avoid spoilage and ensure ingredient efficacy.
Why You Should Embrace DIY Skincare with a Pumpkin Enzyme Mask
Making your own DIY pumpkin enzyme mask not only brings a fresh, nutrient-rich treatment to your skincare routine but also empowers you with control over what you apply to your skin. It’s a satisfying way to connect with natural ingredients and customise your skincare to suit your unique needs. Whether you’re a beginner or an experienced formulator, this simple, effective mask is a fantastic addition to combat dullness and congestion naturally.
So, why wait? Gather your ingredients, roll up your sleeves, and start creating glowing, healthy skin with your very own pumpkin enzyme mask. Your skin—and your senses—will thank you.
You May Also Like