The Beginner’s Guide to DIY Face Moisturisers
Creating your own DIY face moisturiser is a rewarding way to tailor hydration to your skin’s unique needs while avoiding unnecessary additives. Whether you’re a skincare newbie or looking to deepen your formulation skills, this guide will walk you through everything you need—from understanding basic ingredients and emulsions to crafting your own safe, effective moisturiser at home.
Why Choose a DIY Face Moisturiser?
Store-bought moisturisers often contain preservatives, fragrances, and other additives that some people prefer to avoid. Making your own allows you to:
- Customize ingredients based on your skin type and preferences
- Control the hydration level and texture
- Use natural oils, butters, and extracts you trust
- Learn about skincare formulation in a hands-on way
Plus, it’s a fun, creative process that can be adapted as you gain experience.
Understanding the Basics of a DIY Face Moisturiser
What Is a Face Moisturiser?
A face moisturiser is a topical product designed to hydrate the skin’s outer layer and help maintain its natural barrier. Most moisturisers are emulsions — mixtures of water and oils combined with an emulsifying agent to create a smooth, spreadable cream or lotion.
Key Components of a Moisturiser
- Water phase: Provides hydration and often includes humectants like glycerin to attract moisture.
- Oil phase: Includes oils and butters that lock in moisture and protect the skin barrier.
- Emulsifiers: Help water and oil combine into a stable cream.
- Preservatives: Necessary to prevent microbial growth in water-based products.
- Additives: Such as botanical extracts, vitamins, or soothing agents for added benefits.
Step-by-Step Guide: How to Make a Simple DIY Face Moisturiser
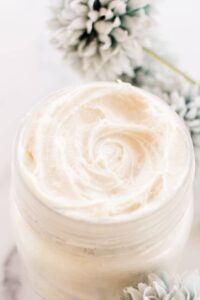
This beginner-friendly recipe creates a lightweight, hydrating cream suitable for normal to dry skin.
Ingredients
- Distilled water – 60g
- Sweet almond oil – 15g (or substitute jojoba or argan oil)
- Shea butter – 10g
- Emulsifying wax (e.g., Polawax or BTMS) – 6g
- Vegetable glycerin – 5g
- Preservative (e.g., Optiphen) – 1g (1% of total weight)
- Optional: a few drops of essential oil or vitamin E (up to 0.5%)
Equipment Needed
- Two heat-safe glass or metal bowls
- Double boiler or saucepan
- Digital scale
- Thermometer
- Stick blender or whisk
- Sterilized container for the finished moisturiser
Instructions
- Weigh the water and glycerin into one bowl (water phase).
- In the second bowl, combine sweet almond oil, shea butter, and emulsifying wax (oil phase).
- Heat both bowls simultaneously in a double boiler to about 70°C (158°F), ensuring all solids melt.
- Remove from heat and slowly pour the water phase into the oil phase.
- Use a stick blender to emulsify the mixture for 2-3 minutes until creamy and uniform.
- Allow the mixture to cool to around 40°C (104°F), then add preservative and any heat-sensitive additives like essential oils or vitamin E.
- Mix gently, then transfer to a sterilized container and let it fully cool before sealing.
Customizing Your DIY Face Moisturiser
Choosing Oils and Butters
Select oils based on your skin type:
- Oily or acne-prone skin: Lightweight oils like jojoba, grapeseed, or rosehip.
- Dry skin: Richer oils and butters like avocado oil, shea butter, or cocoa butter.
- Sensitive skin: Gentle oils such as calendula or chamomile-infused oils.
Adding Humectants and Actives
Humectants like glycerin or sodium PCA attract moisture to the skin. You can also add soothing extracts like aloe vera or green tea, but remember these may impact shelf life and require proper preservation.
Adjusting Texture
More emulsifying wax or butters will thicken the cream, while increasing water or lighter oils yields a thinner lotion. Experiment to find your preferred consistency.
Tips & Safety Notes for DIY Face Moisturisers
Preservation Is Essential
Since DIY face moisturisers contain water, they are prone to bacterial and mold growth. Always add an appropriate broad-spectrum preservative at recommended usage rates (usually 0.5–1%). Without it, your product can spoil quickly and may cause skin irritation or infection.
Check pH When Applicable
Most moisturisers should have a pH between 4.5 and 6.5 to be skin-friendly. While emulsions typically fall within this range, if you add actives like botanical extracts or acids, test the pH with strips or a meter.
Patch Test New Products
Before applying your DIY face moisturiser to your entire face, test a small amount on your inner wrist or behind your ear. Wait 24 hours to check for irritation or allergic reactions.
Storage Recommendations
Store your moisturiser in a cool, dry place away from direct sunlight. Use an airtight container, preferably with a pump or squeeze tube to minimize contamination.
Further Learning and Resources
Ready to expand your DIY skincare skills? Explore our detailed guides on choosing safe preservatives and making natural emulsions to deepen your understanding and confidence in formulation.
Conclusion
Making your own DIY face moisturiser is both accessible and customizable, allowing you to tailor hydration to your skin’s unique needs. By understanding the essential ingredients, following safe formulation practices, and experimenting with textures and additives, you can create a nourishing product that feels great and supports your skin’s health. Ready to get started? Gather your ingredients, follow the step-by-step recipe, and enjoy the satisfaction of crafting your own skincare!
Don’t forget to share your DIY creations and questions with our community. Happy formulating!
You May Also Like