DIY Turmeric Face Mask: The Natural Secret to Radiant Skin
Have you ever looked in the mirror and felt like your skin was missing its natural spark? We have all been there. Between the Australian sun, busy work schedules, and the occasional late night, our complexions can end up looking a bit dull and tired. While there are countless expensive serums on the market promising a “lit-from-within” glow, one of the most powerful skincare secrets might already be sitting in your kitchen pantry. I am talking about the humble golden spice: turmeric. In this guide, you will learn exactly why a DIY turmeric face mask is a game-changer for your skincare routine, how to mix the perfect recipe for your skin type, and my best tips for avoiding the dreaded yellow stain.
The Science Behind the Glow: Why Turmeric Works
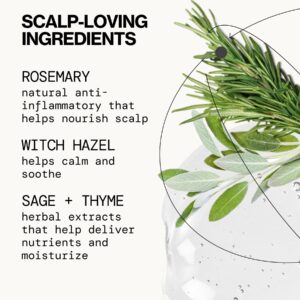
Turmeric is far more than just a vibrant ingredient for your Saturday night curry. It has been used for centuries in Ayurvedic and traditional Chinese medicine for its incredible healing properties. The star of the show is a bioactive compound called curcumin. Curcumin is a powerhouse of anti-inflammatory and antioxidant benefits that can transform the appearance of your skin. When you apply a DIY turmeric face mask, you are essentially giving your skin a concentrated dose of these protective nutrients.
For those dealing with breakouts or redness, turmeric is a natural lifesaver. Its anti-inflammatory nature helps to calm angry skin and reduce puffiness. Furthermore, its antibacterial properties make it a fantastic ally in the fight against acne-causing bacteria. If you are struggling with uneven skin tone or dark spots, regular use can help to gently brighten the skin and fade hyperpigmentation over time. It is a holistic approach to beauty that works with your body’s natural processes.
Many Australians are concerned about premature ageing due to our harsh UV levels. The antioxidants in turmeric help to neutralise free radicals, the unstable molecules that damage skin cells and lead to fine lines. By incorporating a turmeric mask into your weekly ritual, you provide an extra layer of defence for your skin barrier. It is about more than just looking good; it is about long-term skin health. [LINK: natural skincare ingredients | Australian DIY guide]
Choosing the Best Ingredients for Your DIY Turmeric Face Mask
While turmeric is the hero, the supporting cast of ingredients in your mask matters just as much. Depending on whether your skin is oily, dry, or sensitive, you can customise your DIY turmeric face mask to suit your specific needs. The goal is to create a balanced paste that stays on the skin comfortably while delivering maximum benefits. I always recommend using high-quality, organic turmeric powder where possible to ensure you are getting the highest concentration of curcumin without any unwanted additives.
If you have dry or dehydrated skin, you will want to pair your turmeric with deeply moisturising agents. Greek yogurt is a personal favourite of mine because it contains lactic acid, which gently exfoliates while the fats in the yogurt provide much-needed hydration. Honey is another incredible addition; it is a natural humectant, meaning it draws moisture into the skin, and its antibacterial properties complement the turmeric perfectly. For those with oily or acne-prone skin, a few drops of lemon juice or apple cider vinegar can help to balance pH levels and tighten pores, though these should always be used sparingly to avoid irritation.
For a truly luxurious experience, you might even consider adding a teaspoon of chickpea flour, also known as besan. This is a traditional Indian beauty secret that helps to thicken the mask and provides a very gentle physical exfoliation when you wash it off. It also helps the mask adhere better to the skin, preventing it from dripping onto your favourite loungewear. Remember, the best part of DIY skincare is the ability to experiment and find what makes your skin feel its best. [LINK: homemade facial oils | post-mask hydration]
Step-by-Step Recipe: The Ultimate DIY Turmeric Face Mask
Ready to get your glow on? This recipe is my “go-to” for a balanced, brightening treatment that works for most skin types. It is simple, effective, and uses ingredients you likely already have in your cupboard. Before you start, make sure you are wearing an old T-shirt that you do not mind getting a bit of yellow on, just in case of any splashes.
| Ingredient | Amount | Purpose |
|---|---|---|
| Organic Turmeric Powder | 1 Teaspoon | Anti-inflammatory and brightening hero |
| Raw Manuka Honey | 1 Tablespoon | Humectant and antibacterial properties |
| Full-Fat Greek Yogurt | 1 Tablespoon | Soothing hydration and gentle exfoliation |
| Chickpea Flour (Optional) | 1 Teaspoon | Thickening agent and gentle cleanser |
Instructions:
- Mix the Base: In a small ceramic or glass bowl, combine the yogurt and honey. Stir them together until you have a smooth, creamy consistency. Avoid using plastic bowls as turmeric can leave a permanent stain.
- Add the Magic: Sift in the turmeric powder and chickpea flour if you are using it. Mix thoroughly until the colour is a consistent, vibrant orange. You want a paste that is thick enough to stay on your face without running.
- Prep Your Skin: Cleanse your face with a gentle wash to remove any makeup or surface oils. Pat your skin dry with a clean towel.
- Apply the Mask: Using a dedicated mask brush or clean fingertips, apply an even layer of the DIY turmeric face mask to your face and neck. Avoid the delicate eye area and your eyebrows, as turmeric can slightly tint light-coloured hair.
- Relax and Wait: Leave the mask on for 10 to 15 minutes. This is the perfect time to make a cup of tea or listen to a short podcast. You might feel a slight tingling sensation, which is normal, but if it starts to sting, wash it off immediately.
- Rinse Carefully: Use lukewarm water and a dark-coloured washcloth to gently massage the mask off in circular motions. The dark cloth is essential because the turmeric will stain a white one!
- Finish and Hydrate: Follow up with your favourite moisturiser or facial oil to lock in the benefits. Your skin should feel soft, plump, and noticeably brighter.
How to Use a DIY Turmeric Face Mask Without the Stains
The number one concern people have when I mention turmeric is the staining. While turmeric has a very strong natural pigment, with a few clever tricks, you can enjoy all the benefits of a DIY turmeric face mask without looking like a Simpson character for the next three days. The key is in the preparation and removal. If you have very fair skin, you need to be particularly mindful of how long you leave the mask on.
First, always apply a thin layer of facial oil or a heavy moisturiser around your hairline and eyebrows before you start. This creates a barrier that prevents the turmeric from clinging to your hair or the dry skin around your forehead. Secondly, do not leave the mask on until it is bone dry. When a turmeric mask dries completely, it becomes much harder to remove and is more likely to leave a tint behind. Aim for that “tacky” stage where it is set but still has a bit of moisture to it.
If you do find a bit of yellow residue after rinsing, a simple oil cleanse will usually lift the remaining pigment right off. Use a bit of coconut oil, jojoba oil, or even olive oil on a cotton pad and gently wipe the affected areas. The oil binds to the turmeric particles and carries them away far more effectively than soap and water alone. You can also follow up with a splash of milk on a cotton round, as the fats in milk are excellent at neutralising the stain. [LINK: DIY bentonite clay face mask | deep pore cleansing]
Troubleshooting and Safety Tips for Your Turmeric Treatment
While a DIY turmeric face mask is generally safe, natural ingredients are still active. Everyone’s skin reacts differently, so I always recommend performing a patch test on your inner arm 24 hours before applying the mask to your entire face. This is especially crucial if you have sensitive skin or a history of allergies to spices or pollen.
One common mistake is using too much turmeric. A little goes a long way! Using more than a teaspoon does not necessarily increase the benefits, but it certainly increases the risk of staining and irritation. If you find the mask is too intense, try increasing the ratio of yogurt or honey to dilute the turmeric. You should also be cautious if you are currently using strong chemical exfoliants like retinol or high-percentage AHAs, as your skin barrier might be more sensitive than usual.
Lastly, consistency is more important than duration. You will see much better results from using a DIY turmeric face mask once a week for 10 minutes than you will from leaving it on for an hour once a month. If you experience any persistent redness or itching, discontinue use and stick to more soothing ingredients like aloe vera or oatmeal until your skin calms down. DIY skincare should always be a pampering experience, never a painful one.
Conclusion: Embrace Your Natural Glow
In a world of complicated skincare routines, there is something satisfying about returning to nature. A DIY turmeric face mask is a testament to the power of simple, time-tested ingredients. By taking 20 minutes to mix up this golden paste, you are not just treating your skin; you are practicing self-care that dates back generations. Whether you are looking to brighten a dull complexion or soothe inflammation, turmeric is your best friend.
The next time your skin feels lacklustre, skip the shop-bought masks and head to your pantry. Experiment with different additions like aloe vera or mashed avocado to find your perfect blend. If you found this guide helpful, share it with a friend who loves natural beauty. For more DIY skincare tips tailored for the Australian climate, explore our other guides. Here is to healthy, happy, and glowing skin, naturally!
You May Also Like