How to Prevent and Treat Skin Purging from Active Ingredients
Starting a new skincare routine is an exciting journey toward a radiant complexion. However, many DIY enthusiasts experience a setback when their skin flares up after introducing a new serum. This phenomenon, known as skin purging, is frequently a sign that your active ingredients are working by accelerating cell turnover and clearing out deep-seated congestion. When you understand this process, you can approach your skincare goals with greater confidence.
Understanding skin purging active ingredients how to treat them effectively is essential for any home formulator. In this guide, we will explore the science behind the purge, how to distinguish it from a breakout, and practical strategies to minimise discomfort. By the end, you will be equipped to navigate this phase with confidence and maintain a healthy skin barrier. We will also provide a soothing DIY recipe to help your skin recover during this transformation.
What Is Skin Purging?
Skin purging is a temporary reaction when you introduce active ingredients that increase skin cell turnover. Normally, your skin renews itself every 28 to 30 days. However, ingredients like retinoids or hydroxy acids speed up this cycle. This acceleration causes pre-existing microcomedones to rise to the surface much faster than they would have otherwise, resulting in a temporary increase in visible blemishes as your skin clears out accumulated debris.
It is important to recognise that skin purging is not a traditional breakout. While a breakout is caused by a product clogging pores or irritating skin, a purge is a systematic “clearing out” of what was already there. Think of it as a deep spring clean for your pores. This process typically lasts for one skin cycle, about four to six weeks, and occurs in areas where you are already prone to congestion. If you notice breakouts in new areas, it may indicate a reaction rather than a true purge.
Benefits of Managing Skin Purging for Skin
Navigating the purging phase offers long-term advantages for your skin health and the efficacy of your DIY formulations. By managing this process, you ensure your skin transitions smoothly toward the results you desire without unnecessary damage. A well-managed purge is the first step toward achieving a healthy, glowing complexion.
One primary benefit is the preservation of your skin barrier. When you treat skin purging with patience and supportive ingredients, you prevent the inflammation that often accompanies over-exfoliation. A healthy barrier is essential for retaining moisture and protecting against environmental stressors. By maintaining barrier integrity, you ensure your skin remains resilient and capable of healing itself efficiently throughout the process.
Managing the purge effectively reduces the risk of post-inflammatory hyperpigmentation and scarring. By resisting the urge to pick at spots and using soothing ingredients, you allow the skin to heal cleanly. This results in a more even skin tone and smoother texture once the purging phase concludes. Many find that the clarity they achieve after a purge is far superior to their skin’s condition before starting the treatment.
Finally, a well-managed purge leads to better long-term results from your active ingredients. When you don’t give up on a product due to initial purging, you reach the stage where your skin is clearer and more resilient. Consistency is the cornerstone of effective skincare, and knowing how to handle the initial “worse before better” phase is key to achieving your goals. The long-term benefits of using actives far outweigh the temporary discomfort of a purge when managed correctly.
Identifying the Culprits: Common Active Ingredients
To manage your skin, you must identify which ingredients are likely to cause a purge. Not every product will trigger this reaction, and understanding the “power players” in your routine will help you prepare. The following table outlines common active ingredients and their primary functions.
| Active Ingredient | Primary Function | Purging Potential |
|---|---|---|
| Retinoids | Increases cell turnover | High |
| AHA | Exfoliates skin surface | Moderate |
| BHA | Deeply cleanses pores | Moderate |
| Vitamin C | Antioxidant protection | Low |
| Benzoyl Peroxide | Kills acne bacteria | Moderate |
| Azelaic Acid | Reduces inflammation | Low |
What You Need
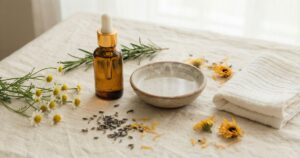
To support your skin during a purge, focus on gentle, barrier-supporting ingredients. If you are formulating a “Recovery Serum” to use alongside your actives, consider these components chosen for their ability to soothe irritation and provide building blocks for skin repair.
- Distilled Water: The pure base for your water-based formulations.
- Hyaluronic Acid: A powerful humectant to keep the skin hydrated and plump.
- Panthenol (Pro-Vitamin B5): Known for its soothing and anti-inflammatory properties.
- Niacinamide (Vitamin B3): Helps to strengthen the skin barrier and regulate oil.
- Vegetable Glycerin: An effective humectant to prevent moisture loss.
- Ceramide Complex: Essential for repairing and maintaining the lipid barrier.
- Allantoin: A soothing agent that promotes skin healing and reduces irritation.
- Preservative: Necessary for any water-based DIY product to ensure safety.
Step-by-Step Recipe: Soothing Barrier Support Serum
This simple recipe is designed to help manage skin purging active ingredients how to treat the associated sensitivity. This serum is lightweight and suitable for all skin types.
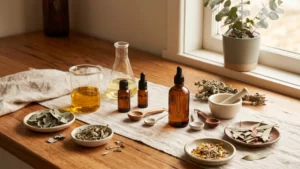
- Sanitise Your Workspace: Ensure all tools and containers are thoroughly cleaned and disinfected with 70% isopropyl alcohol.
- Combine Water Phase: In a glass beaker, weigh out 85g of distilled water and 2g of vegetable glycerin. Stir until fully incorporated.
- Add Active Soothers: Stir in 3g of Niacinamide and 1g of Panthenol until fully dissolved. These ingredients are excellent for calming redness during a purge.
- Hydrate with Hyaluronic Acid: Sprinkle 1g of Hyaluronic Acid over the surface. Allow it to sit for 30 to 60 minutes until it forms a clear gel.
- Incorporate Barrier Repair: Gently stir in 5g of a Ceramide Complex and 2g of your chosen preservative. Ensure the mixture is homogeneous.
- Check the pH: Use pH strips to ensure the serum is between 5.0 and 5.5. Adjust with citric acid if the pH is too high.
- Bottle and Label: Transfer your serum to a sterilised glass dropper bottle and label it with the date. Store it in a cool, dark place.
Tips for Best Results
When you are dealing with skin purging active ingredients how to treat the symptoms effectively requires a strategic approach. Here are practical tips to help you get the best results from your active routine while minimising the purge.
The “Low and Slow” approach is critical for preventing severe purging. Instead of using a new retinoid every night, start by applying it only twice a week. This allows your skin to build tolerance gradually without overwhelming its natural processes. If your skin responds well after two weeks, you can slowly increase the frequency. This method significantly reduces the “shock” to your skin and makes the purging process much more manageable.
Another technique is the “Sandwich Method,” particularly when using retinoids. Apply a layer of your DIY soothing serum or a basic moisturiser first, followed by your active ingredient, and then another layer of moisturiser. This creates a protective buffer that slows down the penetration of the active, reducing irritation without rendering the product ineffective. It is an excellent way to protect a sensitive skin barrier during the initial weeks of treatment.
Lastly, always prioritise sun protection and gentle cleansing. Many active ingredients that cause purging increase your skin’s sensitivity to UV rays. Without adequate sunscreen, the inflammation from purging can turn into long-lasting dark spots. Using a broad-spectrum SPF 50+ daily is non-negotiable. Additionally, avoid using harsh physical scrubs that can further strip your skin. Opt for a gentle cream or oil cleanser to keep your skin calm and hydrated.
Safety and Patch Testing
Before introducing any new active ingredient or DIY formulation, patch testing is a necessity. Apply a small amount of the product to a discreet area, such as the inside of your wrist, and wait 24 to 48 hours to check for adverse reactions. If you experience intense burning or a rash, discontinue use immediately. Remember that while purging involves small whiteheads in usual areas, an allergic reaction often presents as itchy red bumps in areas where you don’t normally break out. Safety should always be your first priority.
Frequently Asked Questions
How long does skin purging typically last?
For most individuals, skin purging lasts between four to six weeks, which corresponds to one full skin cell turnover cycle. If your skin has not started to clear up after eight weeks of consistent use, it is possible the product is causing a standard breakout rather than a purge.
Can I use multiple active ingredients at the same time?
When you are first starting out or experiencing a purge, it is best to avoid “stacking” multiple actives. Using a retinoid and a high-strength AHA on the same night can overwhelm your skin barrier and lead to severe irritation. Introduce one active at a time and ensure your skin is stable before adding another.
Should I stop using the product if I start purging?
Generally, no. If you are certain your skin is purging and not experiencing an allergic reaction, you should continue using the product. Stopping and starting can prevent your skin from ever fully adjusting. However, you can reduce the frequency of application to give your skin more time to recover between uses.
Conclusion
Navigating the world of active ingredients can be a transformative experience for your skin, provided you handle the transitional phases with care. While skin purging can be a temporary hurdle, understanding the science behind it and supporting your skin with barrier-repairing DIY formulations will lead to a clearer complexion in the long run. Try formulating the Soothing Barrier Support Serum today and give your skin the comfort it deserves.
You May Also Like