How to Treat Perioral Dermatitis Naturally at Home
Have you ever woken up to a stubborn, red, bumpy rash around your mouth that just won’t budge? If so, you might be dealing with perioral dermatitis, a common yet incredibly frustrating skin condition that often mimics acne or eczema. For many DIY skincare enthusiasts, the first instinct is to reach for a heavy moisturiser or a potent active ingredient, but when it comes to this specific concern, the “more is more” approach often backfires. Learning how to treat perioral dermatitis naturally at home requires a shift in perspective, focusing on simplicity, barrier repair, and identifying the triggers that are causing your skin to react in the first place.
The journey to clear skin doesn’t always require a prescription pad; in fact, many people find that their skin finally begins to heal when they stop over-complicating their routine. In this guide, we will explore the gentle, natural methods that can help soothe the inflammation and restore your skin’s health. By understanding the root causes and implementing a minimalist, treat perioral dermatitis naturally at home strategy, you can move away from the cycle of flare-ups and towards a calmer, more resilient complexion. Let’s dive into what this condition actually is and how you can manage it using ingredients you likely already have in your apothecary.
What Is Perioral Dermatitis?
Perioral dermatitis is an inflammatory skin condition that primarily affects the area around the mouth (perioral), though it can also appear around the nose (perinasal) and eyes (periocular). It is often referred to as “stewardess disease” because it was historically linked to the frequent use of heavy makeup and moisturisers. Characteristically, the rash consists of small, red, acne-like bumps, often on a background of redness and scaling. One of the most telling signs of perioral dermatitis is a narrow, clear border of normal skin immediately surrounding the lips, which remains unaffected by the rash.
Unlike regular acne, these bumps (papules) don’t usually develop into deep cysts, and unlike eczema, the primary sensation is often burning or itching rather than just dryness. The exact cause is still a bit of a mystery in the dermatological world, but it is widely accepted that a disrupted skin barrier repair process is at the heart of the issue. Triggers can range from the overuse of topical steroids and heavy occlusive creams to environmental factors and even certain ingredients in your dental products. Because the skin is so sensitive during a flare-up, the goal of any natural treatment is to reduce irritation and allow the skin’s natural healing mechanisms to take over.
Benefits of Natural Treatment for Skin
Choosing to treat perioral dermatitis naturally at home offers several distinct advantages over jumping straight to aggressive clinical treatments. While antibiotics and steroid creams are common medical interventions, they don’t always address the underlying lifestyle factors that cause the condition to return. Here are the primary benefits of taking a natural, holistic approach:
- Avoids the Steroid Rebound Effect: One of the biggest pitfalls in treating this condition is the use of topical steroids. While they provide temporary relief, the rash often returns with a vengeance once the cream is stopped. Natural treatments focus on steroid-free treatment to break this cycle permanently.
- Focuses on Long-Term Barrier Health: Instead of just suppressing the symptoms, natural remedies like aloe vera and calendula work to support skin barrier repair. This makes your skin less reactive to future triggers.
- Reduces Chemical Exposure: Many commercial products contain irritants like sodium lauryl sulfate (SLS) and synthetic fragrances. By using DIY recipes, you have complete control over what touches your face, ensuring only the gentlest anti-inflammatory skincare ingredients are used.
- Cost-Effective and Accessible: Most natural remedies for perioral dermatitis involve simple, affordable ingredients that are easy to find. This makes the healing process accessible to everyone without the need for expensive dermatological visits for mild cases.
- Promotes a Mindful Skincare Connection: Taking the time to craft your own soothing treatments encourages a deeper understanding of your skin’s needs, helping you identify personal triggers like stress or diet more effectively.
What You Need
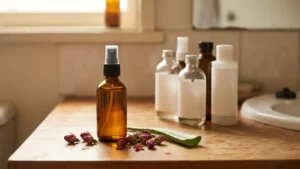
To create our signature Soothing Calendula and Aloe Mist, you will need the following simple, high-quality ingredients. This mist is designed to provide immediate relief from the burning sensation while delivering anti-inflammatory skincare benefits directly to the affected area.
- 1/2 cup Distilled Water (ensures no mineral buildup or bacteria)
- 2 tablespoons Pure Aloe Vera Gel (ensure it is 100% pure and alcohol-free)
- 1 tablespoon Dried Calendula Flowers (known for their incredible healing properties)
- 1 teaspoon Vegetable Glycerin (optional, helps to draw moisture into the skin without being occlusive)
- A clean 100ml glass spray bottle (amber or blue glass is best to protect the botanical ingredients)
Step-by-Step Recipe: Soothing Calendula & Aloe Mist
Follow these steps carefully to ensure your DIY treatment is both effective and safe for your sensitive skin. This recipe is a cornerstone of how to treat perioral dermatitis naturally at home effectively.
- Prepare the Infusion: Boil the distilled water and pour it over the dried calendula flowers in a heat-safe glass jar. Let the flowers steep for at least 15 to 20 minutes. This process extracts the soothing flavonoids and carotenoids from the plant.
- Strain and Cool: Use a fine-mesh strainer or cheesecloth to remove the flower petals. It is crucial to let the “calendula tea” cool down completely to room temperature before moving to the next step. Never apply hot or even warm liquids to a perioral dermatitis flare-up.
- Combine Ingredients: Once cooled, add the pure aloe vera gel and the vegetable glycerin to the infusion. Stir or whisk gently until the mixture is well combined. The aloe vera provides a cooling, anti-inflammatory base, while the glycerin adds a touch of hydration.
- Bottle and Store: Pour the mixture into your clean glass spray bottle. Close it tightly and give it a gentle shake. For an extra-soothing experience, store the bottle in the refrigerator. The cold temperature will help constrict blood vessels and reduce the characteristic redness of the rash.
- Application: Spritz the mist onto your face 2-3 times a day after cleansing with lukewarm water. Allow it to air dry naturally. Avoid rubbing the skin with a towel, as friction can further damage the fragile skin barrier.
Tips for Best Results
Success in managing this condition isn’t just about what you put on your skin, but also what you take away. Here are four essential tips to help you treat perioral dermatitis naturally at home with the best possible outcome:
- Switch Your Toothpaste: This is often the “missing link” for many sufferers. Traditional toothpastes contain fluoride and SLS, both of which can migrate to the skin around the mouth and trigger a reaction. Switching to an SLS-free toothpaste that is also fluoride-free can lead to a dramatic improvement within just a few weeks.
- Adopt a “Zero Therapy” Approach: Sometimes, the best thing you can do is nothing at all. For the first 7-10 days of a flare-up, try washing your face with only lukewarm water and using no other products except your soothing mist. This allows the skin to reset and reduces the risk of further irritation from complex formulations.
- Avoid Heavy Occlusives: While it might seem like your skin is dry and needs a thick balm, heavy oils (like coconut oil or beef tallow) can actually trap heat and bacteria, making perioral dermatitis worse. Stick to light, water-based hydration until the bumps have flattened.
- Identify Internal Triggers: Pay attention to your diet and stress levels. Many people find that spicy foods, cinnamon, or high-stress periods coincide with their flare-ups. Keeping a simple skin diary can help you spot these patterns and manage them holistically.
Safety and Patch Testing
Even though we are using natural, gentle ingredients, safety is paramount when your skin is already in a state of distress. Before applying any new DIY recipe to your face, always perform a patch test on a small, inconspicuous area like the inside of your wrist or behind your ear. Wait 24 hours to ensure no adverse reaction occurs. If the rash on your face becomes excessively painful, begins to ooze, or spreads rapidly toward your eyes, please consult a healthcare professional. Perioral dermatitis can sometimes be confused with fungal acne vs perioral dermatitis, and a professional diagnosis can ensure you are on the right track.
Frequently Asked Questions
Is perioral dermatitis contagious?
No, perioral dermatitis is not contagious. It is an inflammatory condition of the skin, not an infection that can be passed from person to person. However, it can sometimes be associated with an overgrowth of naturally occurring yeast or bacteria on your own skin, which is why keeping your tools and pillowcases clean is still a good idea.
How long does it take to see results with natural treatments?
Patience is key! Because you are focusing on skin barrier repair rather than just masking symptoms, it typically takes 4 to 8 weeks to see a significant clearance of the rash. Your skin cells take about 28 days to turn over, so you need to give the new, healthy cells time to reach the surface.
Can I wear makeup while treating perioral dermatitis?
Ideally, you should avoid makeup on the affected area during the acute phase of the rash. If you must wear it, choose mineral-based powders that are free from bismuth oxychloride, synthetic fragrances, and preservatives. Always double-cleanse very gently at the end of the day to ensure no residue is left behind to irritate the skin further.
Conclusion
Navigating a skin flare-up can feel overwhelming, but learning how to treat perioral dermatitis naturally at home empowers you to take control of your skin’s health. By stripping back your routine, avoiding common triggers like SLS and fluoride, and using soothing botanical ingredients like calendula and aloe, you provide your skin with the quiet environment it needs to heal. Remember, the goal is to support your skin, not to “fight” it. Give this simple soothing mist a try, embrace the minimalist approach, and watch as your skin slowly returns to its natural, glowing state. Your journey to a calmer complexion starts with that first gentle spritz!
You May Also Like