The Ultimate Guide to Smooth Lips: How to Make Your Own DIY Lip Scrub Recipe
There is nothing quite as frustrating as trying to apply your favourite lipstick only to find it clinging to dry, flaky patches on your lips. We have all been there, especially with the harsh Australian sun or the drying effects of winter winds. While we often spend a lot of time and money on elaborate skincare routines for our faces, our lips are frequently overlooked. However, the skin on our lips is incredibly thin and delicate, making it one of the first places to show signs of dehydration and environmental stress. The good news is that you do not need expensive, store-bought exfoliants to achieve a soft, smooth pout. A simple, effective, and natural DIY lip scrub recipe is often all you need to transform your lip care routine from basic to brilliant.
In this comprehensive guide, we are going to dive deep into the world of lip exfoliation. You will learn why regular scrubbing is essential for healthy lips, how to choose the best natural ingredients for your specific needs, and of course, how to master a versatile DIY lip scrub recipe that you can customise in endless ways. Whether you are dealing with chronic dryness or just want to prep your lips for a flawless matte lip colour, these homemade solutions are practical, affordable, and incredibly satisfying to make. By the end of this article, you will be an expert at creating professional-quality lip treatments right in your own kitchen.
Why You Should Make Your Own Lip Scrub
If you have ever browsed the beauty aisles of a major Australian retailer, you have likely seen tiny jars of lip scrub priced at twenty or even thirty dollars. While these products often come in beautiful packaging, their ingredient lists are frequently filled with synthetic fragrances, preservatives, and fillers that do not actually benefit your skin. When you choose to make a DIY lip scrub recipe, you are taking full control of what goes onto your body. This is particularly important for lip products, as we inevitably ingest a small amount of whatever we apply to our mouths. Using food-grade, natural ingredients ensures that your exfoliation routine is as safe as it is effective.
Beyond the safety aspect, DIY lip scrubs are incredibly cost-effective. Most of the ingredients required, such as granulated sugar, honey, and olive oil, are already sitting in your pantry. A single batch costs cents to make but delivers results that rival high-end luxury brands. Furthermore, making your own products allows for total customisation. If your lips are feeling particularly sensitive, you can use a finer grain of sugar. If they are extremely dry, you can increase the ratio of nourishing oils or add a touch of shea butter for extra richness. This level of personalisation is something you simply cannot get from a mass-produced product. Finally, there is a certain joy in the process of creating something yourself. The tactile experience of mixing textures and the wonderful aromas of natural extracts make the preparation of your DIY lip scrub recipe a form of self-care in itself. It is a wonderful way to slow down and treat yourself to a little bit of luxury without the luxury price tag.
Choosing the Right Ingredients for Your Lips
Before we get to the actual mixing, it is important to understand the role each ingredient plays in your DIY lip scrub recipe. A well-balanced scrub consists of three main components: an exfoliant, a moisturiser, and a humectant. The exfoliant is the physical grit that sloughs away dead skin cells. The moisturiser provides the slip and nourishment, while the humectant helps to draw moisture into the skin and keep it there. Understanding these categories allows you to swap ingredients based on what you have on hand or what your lips need most at any given time.
For the exfoliant, sugar is the gold standard. White granulated sugar is a classic choice because its crystals are uniform and provide a medium level of scrub. If you have very sensitive lips, brown sugar is a softer alternative as it contains more moisture and has a smaller, less abrasive grain. For a more intense exfoliation, some people enjoy using coffee grounds, which also provide a natural boost of caffeine that can temporarily plump the lips by increasing circulation. However, for most people, a simple sugar-based DIY lip scrub recipe is the perfect starting point for achieving that smooth texture.
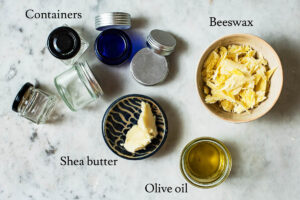
The moisturising element is where you can really get creative with oils and butters. Cold-pressed oils like sweet almond oil, jojoba oil, or extra virgin olive oil are excellent choices because they are rich in fatty acids and vitamins. Coconut oil is another popular option, especially in the warmer Australian months when it remains in a liquid state. If you want a thicker, more decadent scrub, you can incorporate a small amount of melted shea butter or cocoa butter. These solid fats provide a protective barrier on the lips that lasts long after the scrub has been rinsed away. Combining these with a quality humectant like raw honey ensures your DIY lip scrub recipe is both healing and hydrating.
The Best DIY Lip Scrub Recipe: A Versatile Base
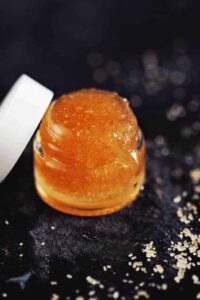
This base recipe is designed to be the only DIY lip scrub recipe you will ever need. It uses a balanced ratio of ingredients to ensure it is easy to apply, effective at exfoliating, and leaves your lips feeling incredibly hydrated. This recipe makes enough for several applications and can be easily doubled or tripled if you are making batches for friends. The key is to achieve a consistency similar to wet sand. It should hold together when pressed but still have enough grit to do its job properly.
| Ingredient | Amount | Purpose |
|---|---|---|
| Granulated Sugar | 2 Tablespoons | Natural exfoliant to remove dead skin cells. |
| Carrier Oil | 1 Tablespoon | Provides moisture and allows the scrub to glide. |
| Raw Honey | 1 Teaspoon | A natural humectant that heals and protects. |
| Vitamin E Oil | 2-3 Drops | Acts as an antioxidant and natural preservative. |
To prepare your scrub, place your sugar in a small, clean glass bowl. Add the honey and your chosen carrier oil. Mix the ingredients thoroughly with a spoon until the sugar is completely coated and the mixture is uniform. If the scrub feels too runny, add a little more sugar. If it feels too dry and crumbly, add a few more drops of oil. Once you are happy with the texture, transfer the mixture into a small, airtight jar. This DIY lip scrub recipe is now ready to use or can be stored for later.
Tips for the Perfect Lip Exfoliation Routine
Knowing how to use it correctly is what truly makes the difference. Many people make the mistake of scrubbing too hard or too often, which can actually damage the thin skin on the lips. The goal is to gently encourage the dead skin to lift away, not to rub the area raw. For most people, exfoliating once or twice a week is more than enough to maintain a smooth texture. If your lips are particularly dry during a change in season, you might increase this to three times a week, but always listen to your skin.
To apply the scrub, start with clean, slightly damp lips. Take a pea-sized amount of your homemade mixture and apply it using your ring finger. Use small, circular motions to massage the scrub across your upper and lower lips for about thirty to sixty seconds. You do not need to apply much pressure. Let the sugar crystals do the work for you. Once you have finished, rinse the scrub off with lukewarm water or gently wipe it away with a soft, damp washcloth. You will immediately notice that your lips feel smoother and look more vibrant. This simple habit can drastically improve the way your lip products look and feel.
The most important step in your routine happens immediately after you rinse. Exfoliation removes the protective layer of dead skin, leaving the fresh skin underneath vulnerable to dehydration. You must follow up with a high-quality moisturiser to lock in hydration. This is the perfect time to apply a nourishing [LINK: DIY natural lip balm recipe | Lip Care] to ensure your lips stay soft and protected throughout the day or night. Skipping this step can lead to your lips drying out even faster than before, so make it a non-negotiable part of your process.
Troubleshooting and Storage
Creating your own DIY lip scrub recipe is generally straightforward, but occasionally you might encounter some minor issues. If you find that your scrub has separated over time, with the oil sitting on top of the sugar, do not worry. This is perfectly normal for natural products without emulsifiers. Simply give the mixture a quick stir with a clean spoon before each use to redistribute the ingredients. If your scrub has become too hard, particularly if you used coconut oil in a cold climate, you can warm the jar between your hands for a minute or two to soften it up.
Storage is another key factor in keeping your homemade products fresh. Because this DIY lip scrub recipe contains food-grade ingredients like honey and sugar, it is important to keep moisture out of the jar. Always use a clean, dry finger or a small spatula to scoop out the product. If water gets into the jar, it can encourage the growth of bacteria or mould. Storing your scrub in a cool, dry place away from direct sunlight will help it last for up to two months. If you notice any change in the smell or appearance of the scrub, it is best to discard it and whip up a fresh batch. After all, it only takes a few minutes! If you are looking to extend the shelf life slightly, adding a few drops of Vitamin E oil is a great tip. Vitamin E is a natural antioxidant that helps to prevent the oils in your scrub from going rancid. It also provides extra nourishment for your skin, making it a win-win addition to any recipe.
Conclusion
Taking care of your lips does not have to be a complicated or expensive endeavour. By mastering a simple DIY lip scrub recipe, you are investing in a sustainable, natural, and highly effective way to maintain a beautiful smile. The ability to customise your ingredients means you can cater to your skin’s changing needs throughout the year, ensuring your pout remains soft, hydrated, and ready for anything. From the basic sugar and oil mix to more adventurous variations, the possibilities for your home beauty lab are truly endless.
We hope this guide has inspired you to clear out those overpriced commercial products and embrace the power of pantry staples. There is something incredibly empowering about knowing exactly what is in your skincare and seeing the immediate results of your own handiwork. So, gather your ingredients, find a cute little jar, and start mixing. Your lips will thank you for the extra love and attention. If you enjoyed making this scrub, why not expand your DIY repertoire? You can find more inspiration by exploring our [LINK: DIY natural lip balm recipe | Lip Care] guide to complete your ultimate lip care duo. Happy crafting, and here is to many days of perfectly smooth, healthy lips!
You May Also Like