Ingredient sourcing note: Some ingredients mentioned in this article are available from The Skin Science Company (theskinsciencecompany.com.au), an Australian cosmetic raw materials supplier. We recommend them based on the quality and availability of their products. We have no commercial, affiliate, or sponsorship relationship with them and receive no payment or commission for these mentions.
I still remember the exact moment I fell out of love with luxury skincare.
I was standing under the bright lights of a department store beauty hall, holding a heavy, frosted glass jar. It felt expensive. It smelled like a spa. And it cost more than my weekly grocery shop.
I wanted it. I wanted the promise of “radiance” and “youth” printed on the box. But then, my inner skeptic kicked in. I flipped the box over to scan the ingredients list.
The actual active ingredients—the botanicals and vitamins I was supposedly paying a premium for—were listed way down at the bottom, sandwiched between the preservatives and the fragrance. I did the mental math: I was about to pay $150 for a jar of fancy water.
That was the day I put the jar back on the shelf and decided to figure out how to make a DIY face serum that actually delivered on its promises.
The “High-End” Myth vs. Kitchen Bench Reality
If you’re anything like me, you probably worry that making your own skincare is a bit… crunchy. You might picture separation, mess, or the time you tried to whip up a complex DIY eczema cream and it went off in a week.
But here’s the thing: making your own serum isn’t just cheaper; strictly speaking, it’s often better for your skin.
When you buy a commercial cream, you are paying for fillers, emulsifiers (to mix oil and water), and strong preservatives to stop that water from growing mould. When you strip all that away and create an oil-based serum, you are left with 100% potency.
My goal was simple: I wanted a DIY anti-aging serum that was all killer, no filler. No water means no bacteria, which means you don’t need a complex natural preservative for DIY skincare system. Just pure, concentrated plant power.
My Secret Weapon: The Australian Edge
When I started looking into homemade face serum recipes, I noticed a lot of American and European blogs recommending essential oils that smell nice but don’t do much for skin structure.
I wanted results. I wanted to wake up looking like I’d had eight hours of sleep (even if I’d only had five).
That’s when I discovered the incredible Kakadu plum skincare benefits. Native to Northern Australia, this fruit has the highest recorded concentration of Vitamin C in the world. It makes oranges look lazy.
While synthetic Vitamin C in store-bought serums is notoriously unstable (it turns orange and useless very quickly), pure Kakadu Plum oil is a powerhouse for brightening and protecting skin against our harsh sun.
The Recipe: The “Glow Repair” Serum
This is the exact formula I use. It’s rich, golden, and costs a fraction of the price of the luxury brands. I source my ingredients from Australian online suppliers to ensure they are fresh and ethical.
Prep time: 5 minutes
Shelf life: Approx. 6 months
Cost per bottle: Roughly $20 (depending on your bulk buy)
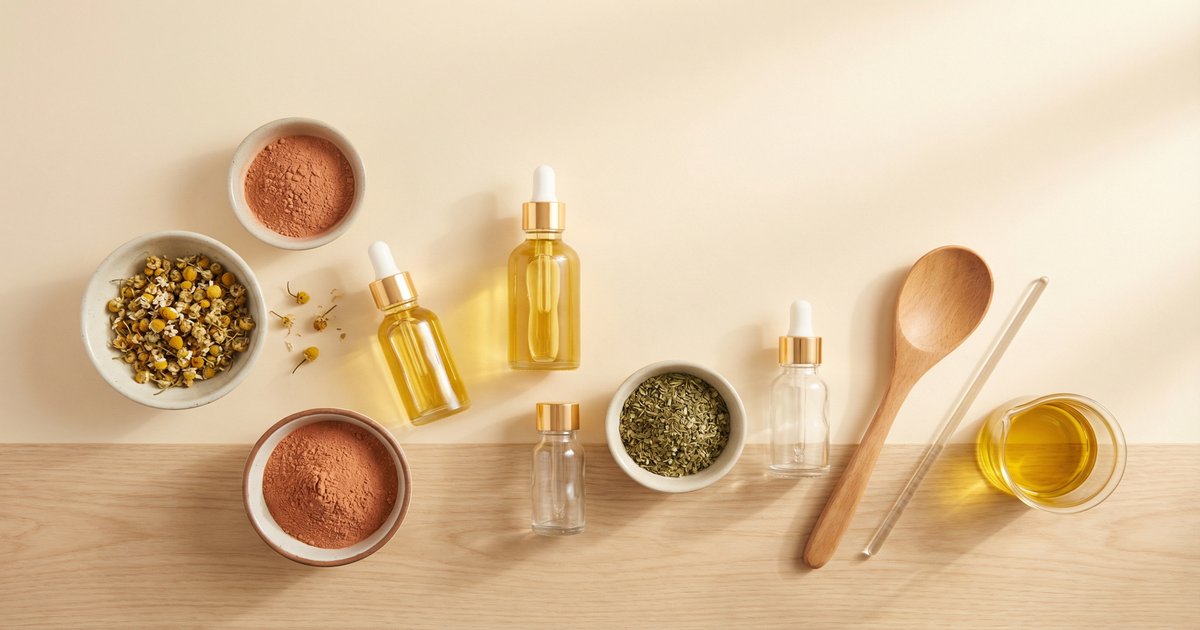
What You’ll Need:
- 30ml Jojoba Oil: This is your base. It mimics the human skin’s natural sebum, so it sinks in instantly without clogging pores.
- 15ml Rosehip Oil: The anti-aging queen. It’s rich in Vitamin A (natural retinol) to help with cell turnover.
- 5ml Kakadu Plum Seed Oil: For that massive Vitamin C hit and brightness.
- 2ml Vitamin E Oil (Natural): This acts as an antioxidant to keep the oils fresh and helps repair a damaged skin barrier.
- Optional: 4 drops of Frankincense or Geranium essential oil (for skin tightening and a grounding scent).
The Method:
1. Cleanse everything. Even though we aren’t using water, hygiene is key. Wipe down your small glass beaker and your 50ml amber dropper bottle with rubbing alcohol or vodka.
2. Measure and mix. Pour the Jojoba and Rosehip oils into your beaker. These are your “carrier” oils—the vehicle that delivers the goods.
3. Add the actives. Stir in the Kakadu Plum oil and the Vitamin E. This is where the magic happens. These are the active ingredients for skin transformation.
4. Scent gently. If you’re using essential oils, add them last. Stir well with a glass rod or a clean spoon.
5. Bottle it up. Pour the golden liquid into your amber bottle (amber glass protects the precious oils from sunlight). Label it with the date.
How to Use It (Don’t Skip This!)
This is where most people go wrong with oils and end up feeling greasy.
Because there is no water in this serum, you need to provide the hydration yourself. After washing your face, while your skin is still damp (or after a spritz of toner), take 3–4 drops of the serum.
Rub it between your palms to warm it up, then press it into your skin. Don’t rub; press. This traps the moisture into your skin and leaves you with a dewy, satin finish rather than an oil slick.
The Verdict
Since making the switch, my skin feels calmer and looks brighter. But honestly? The best part is the ritual.
There is something deeply satisfying about looking at that little amber bottle on my bathroom shelf and knowing exactly what is inside it. No hidden nasties, no marketing fluff—just pure, effective ingredients that I blended myself.
If you decide to try this DIY face serum, I’d love to hear how you go. Do you have a favourite Australian oil I should try next? Let me know!
You May Also Like