Unveiling the Secret: Why Your Anti-Ageing Routine Needs a DIY Rosehip Oil Serum
In the vast world of skincare, it’s easy to get lost in a sea of products boasting miracle results. But what if the most powerful anti-ageing ingredient was something you could craft yourself? DIY rosehip oil serum has been quietly transforming complexions worldwide, and its ability to reduce fine lines and improve skin tone naturally might just surprise you. Packed with vitamin A and essential fatty acids, rosehip oil is a botanical powerhouse that deserves a spot in your skincare arsenal.
Why Choose a DIY Rosehip Oil Serum?
Rosehip oil is celebrated for its regenerative properties, thanks to its rich content of retinoids (natural vitamin A derivatives), antioxidants, and omega fatty acids. These compounds work synergistically to promote cell turnover, boost collagen production, and enhance skin elasticity—all key players in anti-ageing.
Making your own serum allows you to harness these benefits in a pure, customised formulation free from unnecessary additives or preservatives. Plus, it’s incredibly rewarding to blend your own skincare, knowing exactly what goes into your product.
Ingredients for Your DIY Rosehip Oil Serum
Below is a carefully balanced recipe designed for all skin types, especially mature or sensitive skin prone to ageing signs. The percentages help you adjust the batch size easily.
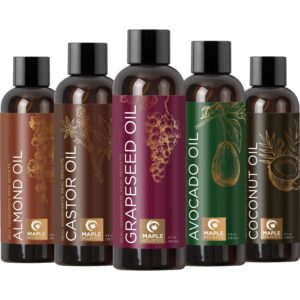
- Rosehip Oil (Rosa canina) – 70%
Rich in vitamin A, linoleic and linolenic fatty acids for skin regeneration and hydration. - Jojoba Oil – 15%
Closely mimics skin’s natural sebum, providing moisture without clogging pores. - Argan Oil – 10%
High in vitamin E and antioxidants to protect and nourish skin. - Vitamin E Oil (Tocopherol) – 3%
Natural preservative and powerful antioxidant to prolong shelf life. - Essential Oil Blend (optional) – 2%
Choose skin-friendly options like lavender or frankincense for added therapeutic benefits and scent.
Example Quantities for a 30 ml Bottle
- Rosehip Oil – 21 ml
- Jojoba Oil – 4.5 ml
- Argan Oil – 3 ml
- Vitamin E Oil – 0.9 ml (approximately 18 drops)
- Essential Oil Blend – 0.6 ml (around 12 drops, optional)
Step-by-Step Guide to Making Your DIY Rosehip Oil Serum
- Sanitise Your Workspace and Tools: Before starting, clean your hands, work surface, glass mixing bowl, dropper bottles, and spoons with warm soapy water or 70% isopropyl alcohol. This prevents contamination and extends product shelf life.
- Measure Your Oils Accurately: Use a digital scale for precision, especially if adjusting batch size. Pour rosehip, jojoba, and argan oils into the glass bowl.
- Add Vitamin E Oil: This acts as a natural antioxidant to help prevent your serum from oxidising too quickly.
- Introduce Essential Oils (If Using): Add your chosen essential oils carefully, bearing in mind sensitive skin considerations. Lavender and frankincense are excellent anti-ageing choices.
- Mix Thoroughly: Stir gently with a glass stirrer or sanitized spoon until all oils are fully combined.
- Transfer to Bottle: Using a small funnel, pour the serum into a dark glass dropper bottle to protect it from light degradation.
- Label and Store: Mark the bottle with the formulation date and contents.
How to Use Your DIY Rosehip Oil Serum
Apply 3-5 drops to freshly cleansed face and neck every evening. Gently press the oil into the skin with your fingertips, allowing it to absorb fully. Follow with your usual moisturiser if needed. Avoid applying near the eyes and always conduct a patch test before first use.
Safety Precautions and Storage Tips
- Patch Test First: Apply a small amount of serum on your inner forearm and wait 24 hours to check for adverse reactions.
- Avoid Sun Exposure: Rosehip oil contains natural retinoids that can increase photosensitivity. Use the serum at night and apply sunscreen during the day.
- Storage: Keep your serum in a cool, dark place away from heat and sunlight to preserve potency.
- Shelf Life: Your serum should last 3-6 months if stored correctly. If it smells rancid or changes colour, discard immediately.
- Essential Oil Caution: Not recommended for pregnant or breastfeeding women without professional advice.
FAQ: Your DIY Rosehip Oil Serum Questions Answered
Q1: Can I use only rosehip oil as my serum?
Yes, pure rosehip oil is beneficial on its own; however, blending it with jojoba and argan oils enhances moisturising properties and improves skin absorption, creating a more balanced serum.
Q2: Is DIY rosehip oil serum suitable for oily or acne-prone skin?
Rosehip oil is non-comedogenic and can help balance sebum production. When combined with jojoba oil, it makes a lightweight serum suitable for oily or acne-prone skin. Always patch test and monitor skin response.
Q3: How often should I apply the serum?
For best results, apply your DIY rosehip oil serum nightly. Consistency is key in anti-ageing skincare routines.
Q4: Can I add other essential oils?
Yes, but choose skin-safe options and use them sparingly (maximum 1-2%). Avoid photosensitive oils like bergamot. Always research essential oil safety, especially for sensitive skin.
Q5: Can men use this serum?
Absolutely! The nourishing and anti-ageing benefits of rosehip oil serum are universal, making it perfect for anyone interested in natural skincare.
Embrace the Power of DIY Skincare with Your Rosehip Oil Serum
Crafting a DIY rosehip oil serum is more than a skincare ritual—it’s a journey into understanding and nurturing your skin with nature’s finest ingredients. This simple yet potent formula delivers anti-ageing benefits while empowering you to take control of what touches your skin. So why wait? Gather your oils, blend your own serum, and watch your skin glow with youthful vitality. Remember, when it comes to skincare, the best secrets are often the ones you create yourself.
You May Also Like