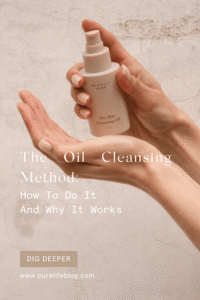
Discover the Secret to Effortless Makeup Removal with a DIY Oil Cleanser
Have you ever wondered why some people rave about oil cleansers as the ultimate makeup remover, yet you hesitate to try one yourself? The idea of applying oil to your face might seem counterintuitive, especially if you have oily or acne-prone skin. But what if a simple, DIY oil cleanser made with pure jojoba oil could change your entire skincare routine? Gentle, effective, and perfect for the first step in a double cleanse, this homemade cleanser could be your new skincare hero.
Why Choose a Jojoba Oil Cleanser for Makeup Removal?
Jojoba oil is unique amongst oils because its molecular structure closely resembles the natural sebum produced by our skin. This means it can dissolve makeup and impurities without stripping your skin’s natural moisture barrier. Unlike harsh foaming cleansers, a jojoba-based oil cleanser leaves your skin feeling soft, balanced, and hydrated.
Using a DIY oil cleanser is especially beneficial for:
- Breaking down stubborn waterproof makeup and sunscreen
- Maintaining skin’s natural oils and preventing dryness
- Reducing irritation and redness from over-cleansing
- Supporting a thorough double cleanse routine
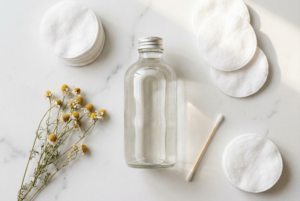
DIY Jojoba Oil Cleanser Recipe: Ingredients and Percentages
This simple recipe combines jojoba oil with a few complementary oils and gentle emulsifiers to create a lightweight, effective cleansing oil suitable for all skin types.
| Ingredient | Usage (%) | Weight (grams) |
|---|---|---|
| Jojoba Oil (carrier oil) | 75% | 75g |
| Castor Oil (cleansing oil) | 15% | 15g |
| Sweet Almond Oil (emollient) | 8% | 8g |
| Polysorbate 80 (emulsifier) | 2% | 2g |
Note: Quantities are based on making 100 grams total. Adjust proportionally for larger or smaller batches.
Equipment You’ll Need
- Digital scale (accuracy to 0.1g)
- Glass mixing beaker or bowl
- Stirring utensil (glass rod or spoon)
- Dark glass bottle with pump or dropper for storage
- Measuring spoons (if you prefer volume over weight)
Step-by-Step Guide to Making Your DIY Oil Cleanser
- Sanitise your workspace and equipment. Wash your hands thoroughly and wipe down all tools and surfaces with an alcohol solution to prevent contamination.
- Weigh your oils. Using your digital scale, measure jojoba oil, castor oil, and sweet almond oil into your mixing beaker.
- Add the emulsifier. Weigh out the polysorbate 80 and add it to your oil blend. Polysorbate 80 helps the oil rinse off easily with water, preventing a greasy residue.
- Mix thoroughly. Stir the mixture vigorously for 2-3 minutes to ensure the emulsifier is fully incorporated and the blend is uniform.
- Transfer to storage container. Pour your oil cleanser into the dark glass bottle with a pump or dropper to protect it from light and air exposure.
- Label your product. Include the date of preparation and ingredients for future reference.
How to Use Your DIY Jojoba Oil Cleanser Effectively
Apply a small amount (about a teaspoon) of the oil cleanser onto dry hands and massage gently onto your dry face, focusing on areas with makeup or sunscreen. Use circular motions to dissolve impurities. Add a splash of warm water to emulsify, then rinse thoroughly with lukewarm water. Follow with your preferred water-based cleanser for a complete double cleanse.
Safety Notes and Storage Tips
- Patch test first. Apply a small amount of the cleanser on your inner wrist or behind your ear to check for any allergic reactions.
- Avoid contact with eyes. Although jojoba oil is gentle, avoid getting the product directly into your eyes. If contact occurs, rinse thoroughly with water.
- Store in a cool, dark place. Keep your cleanser away from direct sunlight and heat to preserve the oils’ integrity.
- Shelf life. With proper storage, your DIY oil cleanser will last 6 to 9 months. Use within this timeframe to ensure freshness and safety.
Frequently Asked Questions About DIY Oil Cleansers
1. Can I use this oil cleanser on sensitive or acne-prone skin?
Yes, jojoba oil is non-comedogenic and closely mimics skin’s natural oils, making it suitable for sensitive and acne-prone skin. However, always do a patch test first to ensure your skin reacts well to the ingredients.
2. Why do I need an emulsifier like Polysorbate 80 in the recipe?
The emulsifier helps the oil mix with water during rinsing, allowing the cleanser to rinse off cleanly without leaving an oily residue. Without it, you might feel greasy after washing.
3. Can I substitute other oils for jojoba oil?
While you can experiment with other carrier oils, jojoba oil is preferred due to its skin compatibility and stability. If substituting, choose oils with similar properties and shelf life, such as serum-ageing-skin/”>argan or grapeseed oil.
4. How does a DIY oil cleanser fit into a double cleanse routine?
The oil cleanser is the first step in a double cleanse, designed to break down makeup, sunscreen, and excess sebum. Follow it with a gentle water-based cleanser to remove any remaining residue and impurities.
5. Can I add essential oils or other actives to this cleanser?
It’s possible, but proceed with caution. Essential oils can irritate sensitive skin, and adding actives may affect the product’s stability. If you choose to add them, do so in small amounts and perform thorough patch testing.
Final Thoughts: Embrace the Joy of DIY Skincare
Making your own DIY oil cleanser with jojoba oil is a rewarding way to take control of your skincare routine. It’s gentle, effective, and crafted from ingredients you trust. Whether you’re a beginner or an experienced formulator, this recipe invites you to explore the nourishing benefits of natural oils while saving money and avoiding unwanted chemicals.
Try this jojoba oil cleanser today and experience the transformative power of a personalised, sustainable approach to beauty. Your skin—and your conscience—will thank you.
You May Also Like