Unlock the Secret to Youthful Skin: DIY Retinol Serum with Vitamin A
Retinol is often hailed as the holy grail of anti-ageing skincare, but buying a good quality retinol serum can be expensive, and not all products suit every skin type. What if you could craft your own potent, effective DIY retinol serum tailored exactly to your skin’s needs? Sounds intriguing, right? In this guide, you’ll learn how to formulate a stable, safe, and skin-loving retinol serum using vitamin A, alongside tips to introduce it gradually and maximise results.
Why Choose a DIY Retinol Serum?
Many commercial retinol serums include fillers, preservatives, or ingredients that might irritate sensitive skin. By making your own serum, you control every ingredient, concentration, and carrier oil, ensuring your serum is as gentle or as potent as you desire. Plus, creating your own serum is a rewarding way to deepen your DIY skincare skills and understand your skin’s unique responses.
Understanding Retinol and Vitamin A in Skincare
Retinol is a form of vitamin A that promotes skin cell turnover, increases collagen production, and helps reduce fine lines, wrinkles, and uneven pigmentation. Vitamin A derivatives come in varying strengths, including retinol, retinaldehyde, and retinoic acid (the latter is prescription-only). For DIY purposes, retinol powder or retinol concentrate is the most accessible and effective choice.
Retinol is sensitive to light, air, and heat, so formulation and storage play critical roles in maintaining its potency.
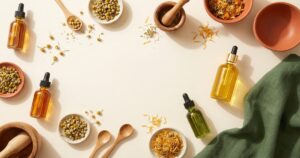
Ingredients List for DIY Retinol Serum
Here’s a simple yet effective recipe designed for beginners and experienced formulators alike. This serum uses a 0.5% retinol concentration, which is a good starting point to minimise irritation and build tolerance.
- Retinol powder (vitamin A palmitate or pure retinol): 0.5% (0.5g for 100g serum)
- Rosehip seed oil (rich in natural vitamin A and antioxidants): 40% (40g)
- Squalane (stable, lightweight carrier oil): 50% (50g)
- Tocopherol (Vitamin E oil, natural antioxidant and stabiliser): 1% (1g)
- Preservative (e.g. Leucidal Liquid SF or Geogard ECT): 2% (2g)
- Solubiliser or emulsifier (optional, depending on ingredients, e.g. polysorbate 80): 1-2%
- Distilled water or hydrosol (optional if you prefer a lighter serum texture): up to 5%
Note: If you prefer a water-free serum, omit water and emulsifier; this results in a stable oil-based serum.
Step-by-Step Method to Formulate Your DIY Retinol Serum
- Prepare your workspace: Clean and sanitise all utensils, containers, and surfaces to avoid contamination.
- Weigh the ingredients accurately: Use a digital scale with 0.01g precision for best results.
- Dissolve the retinol powder: In a small glass container, dissolve 0.5g retinol powder in 5g of squalane or rosehip oil. Gently warm (no more than 40°C) this mixture in a water bath to help solubilise the retinol fully.
- Mix the carrier oils: Combine the remaining 85g (40g rosehip seed oil + 45g squalane) in a separate container.
- Add dissolved retinol to carrier oils: Stir the retinol-oil solution into the combined carrier oils thoroughly.
- Add antioxidant and preservative: Add 1g Vitamin E oil and 2g preservative, stirring well to ensure even distribution.
- Add water or hydrosol (optional): If incorporating water or hydrosol, blend with the emulsifier first, then slowly add to the oil phase while mixing vigorously to create a stable serum.
- Transfer to a dark glass dropper bottle: Use amber or cobalt blue bottles to protect the serum from light degradation.
- Label your serum: Include the date of manufacture and concentration of retinol.
Safety Precautions When Using Retinol
- Start slow: Use your DIY retinol serum 2-3 times a week initially to allow your skin to adapt.
- Patch test: Apply a small amount on your inner forearm or behind your ear to check for adverse reactions before full face use.
- Avoid sun exposure: Retinol increases photosensitivity. Always apply sunscreen during the day and use retinol serums at night.
- Avoid mixing with certain actives: Be cautious when combining retinol with AHAs, BHAs, or vitamin C to prevent irritation.
- Consult a healthcare professional: If pregnant, breastfeeding, or on certain medications, consult your doctor before retinol use.
Storage and Shelf Life Tips
Retinol degrades quickly when exposed to air, heat, and light. To keep your DIY retinol serum potent:
- Store in a dark, cool place like a fridge or a cabinet away from sunlight.
- Use an airtight dark glass bottle with a dropper to limit oxygen exposure.
- Make small batches (max 3 months supply) to ensure freshness and efficacy.
- Discard the serum if it changes colour (turns orange or brown) or develops an off smell.
FAQ: Your DIY Retinol Serum Questions Answered
1. What concentration of retinol is safe for beginners?
Starting with 0.3% to 0.5% retinol is recommended for most skin types to reduce irritation risk. You can gradually increase concentration as your skin builds tolerance.
2. Can I use other carrier oils besides rosehip and squalane?
Yes, stable oils rich in antioxidants and with a light texture like jojoba oil or argan oil are great alternatives. Avoid oils prone to rancidity, such as flaxseed or walnut oil.
3. How long does the DIY retinol serum last?
When stored properly in dark glass containers at cool temperatures, your serum should last 8-12 weeks. Always check for colour or smell changes before use.
4. Can I add essential oils to the serum?
Essential oils can be irritating, especially when combined with retinol. If you want to add them, do so cautiously and keep total essential oil concentration below 0.5%.
5. How should I introduce retinol into my skincare routine?
Begin by applying your DIY retinol serum every second or third night. Monitor your skin for dryness or redness and gradually increase frequency if tolerated. Always follow with moisturiser and use sunscreen in the morning.
Final Thoughts: Embrace the Power of DIY Skincare
Crafting your own DIY retinol serum is a fulfilling way to take control of your skincare routine, save money, and deepen your understanding of ingredient interactions. With patience, care, and attention to detail, you can create a high-quality, personalised retinol serum that delivers real anti-ageing benefits from the comfort of your home. So, why not roll up your sleeves and give DIY skincare a go? Your skin will thank you for it.
You May Also Like