Ingredient sourcing note: Some ingredients mentioned in this article are available from The Skin Science Company (theskinsciencecompany.com.au), an Australian cosmetic raw materials supplier. We recommend them based on the quality and availability of their products. We have no commercial, affiliate, or sponsorship relationship with them and receive no payment or commission for these mentions.
The Ultimate DIY Sugar Scrub Recipe for Silky Smooth Skin
There is something incredibly satisfying about creating your own skincare products at home. Not only do you know exactly what is going into the jar, but you can also tailor the ingredients to suit your specific skin needs. If you have been searching for the perfect DIY sugar scrub recipe, you have come to the right place. In this comprehensive guide, we will explore why sugar is a powerhouse for exfoliation, how to choose the right carrier oils, and provide a step-by-step method to achieve professional-quality results in your own kitchen. Whether you are a seasoned formulator or a complete beginner, making your own scrub is a rewarding way to care for your body.
In the world of natural beauty, simple ingredients often yield the best results. Many spend a fortune on high-end scrubs filled with synthetic fragrances and preservatives. By mastering a reliable DIY sugar scrub recipe, you avoid these additives while enjoying a luxurious experience. The beauty of a homemade scrub is its versatility—you can make it as coarse or as fine as you like, and the scent possibilities are endless. It is a fantastic way to treat yourself or create thoughtful gifts for friends.
Exfoliation is a vital step in any skincare routine, helping to remove dead skin cells and improve texture. While many commercial exfoliants are available, a homemade version is more cost-effective and free from harsh synthetic fragrances. Whether prepping for a fake tan or indulging in self-care, this DIY sugar scrub recipe will leave your skin feeling incredibly soft and hydrated.
Why a DIY Sugar Scrub Recipe is Better for Your Skin
Sugar is a natural humectant, meaning it draws moisture from the environment into the skin. When used in a scrub, it provides two main benefits: physical exfoliation and chemical exfoliation. The granules physically buff away dry, flaky skin, while the natural glycolic acid found in sugar helps to break down the bonds between dead skin cells, encouraging faster cell turnover. This dual-action approach is why so many people swear by a DIY sugar scrub recipe for maintaining a healthy glow. Unlike some chemical peels that can be harsh on the skin’s barrier, sugar provides a gentle yet effective way to reveal the fresh, radiant skin underneath.
One of the most significant advantages of using sugar as an exfoliant is its solubility. As you massage the scrub onto your skin in the shower, the sugar granules slowly dissolve. This built-in safety mechanism prevents you from over-exfoliating, as the “scrubbing” action naturally diminishes as the sugar melts. This makes a DIY sugar scrub recipe much safer for regular use than scrubs containing ground nut shells or fruit pits, which can have jagged edges that cause micro-tears in the skin. By controlling the pressure and the duration of your scrub, you can achieve a perfectly customised level of exfoliation every single time.
Unlike salt scrubs, sugar granules are smaller and more rounded, making them ideal for the body. If you are new to making products, starting with a simple DIY sugar scrub recipe is a great way to build confidence. You can adjust the “grit” by choosing different sugars, such as fine white sugar or raw sugar. By making your own, you can incorporate high-quality Australian ingredients like Sweet Almond Oil or Macadamia Oil to ensure your skin is moisturised while exfoliated. [LINK: carrier oil guide | choosing the right base for your scrub]
Choosing Your Ingredients: The Science of Smooth
The secret to a truly effective DIY sugar scrub recipe lies in the balance between the exfoliant and the emollient. While sugar provides the scrub, the oil provides the slip and the nourishment. Not all oils are created equal, and choosing the right one can make a significant difference in how the final product feels on your skin. For example, Fractionated Coconut Oil is a popular choice because it remains liquid at room temperature and has a very long shelf life, making it a practical option for bathroom storage.
If you have particularly dry skin, you might want to consider adding a small amount of Vitamin E Oil to your mixture. Vitamin E is a powerful antioxidant that helps to protect the skin and also acts as a natural preservative for the other oils in your scrub. For those who enjoy a bit of aromatherapy with their skincare, adding a few drops of Lavender Essential Oil can turn a simple shower into a relaxing spa-like experience. [LINK: essential oil safety | how to dilute oils for topical use]
When selecting your sugar, consider the following options:
- White Granulated Sugar: The standard choice for most body scrubs. It provides a medium level of exfoliation and dissolves relatively quickly in water.
- Brown Sugar: Softer and more moist than white sugar, making it the best choice for sensitive skin or even a gentle lip scrub.
- Raw or Turbinado Sugar: These have larger crystals and provide a much deeper exfoliation, perfect for rough areas like elbows and heels.
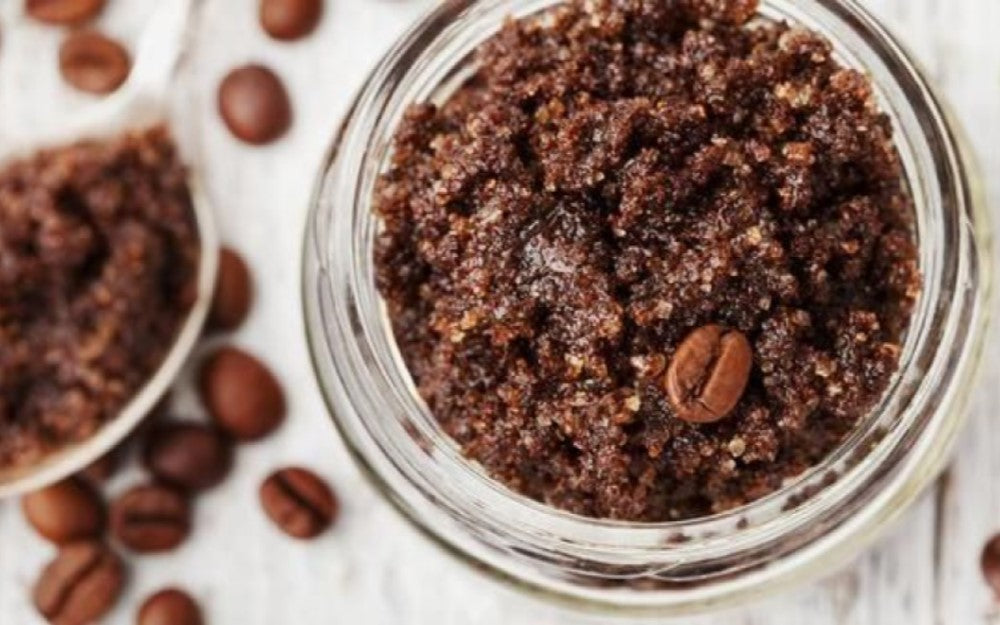
The Ultimate DIY Sugar Scrub Recipe
This recipe is designed to create a balanced, luxurious scrub that exfoliates effectively without leaving a greasy residue. It uses a combination of white and brown sugar for a multi-level texture and a blend of nourishing oils to lock in moisture.
Ingredients Table
| Ingredient | Amount | Purpose |
|---|---|---|
| White Granulated Sugar | 1 Cup | Primary physical exfoliant |
| Light Brown Sugar | 1/2 Cup | Gentle exfoliation and humectant properties |
| Sweet Almond Oil | 1/2 Cup | Nourishing carrier oil rich in Vitamin E |
| Fractionated Coconut Oil | 1/4 Cup | Provides a lightweight, non-greasy feel |
| Vitamin E Oil | 1 Teaspoon | Antioxidant and skin conditioning |
| Orange Sweet Essential Oil | 10-15 Drops | Natural uplifting fragrance |
Step-by-Step Instructions
- Prepare Your Workspace: Ensure all your bowls and mixing utensils are clean and dry. Any water introduced into the scrub can encourage bacterial growth over time.
- Mix the Sugars: In a medium-sized mixing bowl, combine the white sugar and the brown sugar. Use a fork to break up any lumps in the brown sugar until you have a consistent texture.
- Combine the Oils: In a separate small jug, mix the Sweet Almond Oil, Fractionated Coconut Oil, and Vitamin E Oil. Stir gently to combine.
- Add Essential Oils: Add your chosen essential oils to the oil mixture. We recommend Orange Sweet Essential Oil for a refreshing, citrusy scent that brightens the mood.
- Merge Wet and Dry: Slowly pour the oil mixture into the sugar. Use a large spoon to fold the ingredients together. You are looking for a consistency that resembles wet sand.
- Store Correctly: Transfer your finished scrub into a clean, airtight glass jar. A wide-mouth jar is best for easy access in the shower.
Tips and Troubleshooting for Your Homemade Scrub
While this DIY sugar scrub recipe is quite forgiving, there are a few tips to ensure you get the best possible results. One common issue is the oil separating from the sugar over time. This is perfectly normal for natural products. Simply give the jar a quick stir with a clean spoon before each use to redistribute the oils. If you find the scrub is too “soupy,” add a tablespoon of sugar at a time until you reach your desired thickness. Conversely, if it feels too dry, add a teaspoon of carrier oil. Another helpful tip is to ensure your sugar is fresh—clumpy or damp sugar can affect the texture and shelf life of your finished product.
To extend the shelf life of your scrub, consider where it is stored. Because this DIY sugar scrub recipe contains no water, it is less prone to mould than a lotion. However, introducing water into the jar can shorten its lifespan. To keep your scrub fresh, use a clean, dry spoon to scoop out what you need and keep the lid tightly sealed. If you notice any change in smell, discard the remaining product and make a fresh batch.
Safety is also paramount when using oil-based products in the shower. The oils can make the floor of your shower or bathtub quite slippery, so always use caution and consider using a bath mat. To keep your scrub fresh for as long as possible, try to avoid getting water inside the jar during use. Using a small wooden scoop or a clean spoon to remove the product rather than your fingers can also help prevent contamination.
For the best results, use your DIY sugar scrub recipe two to three times a week. Apply it to damp skin in gentle, circular motions, paying extra attention to dry areas like knees and elbows. Rinse thoroughly with warm water and pat your skin dry with a soft towel. You will notice an immediate difference in how your skin feels—smoother, softer, and perfectly prepped for your favourite moisturiser. [LINK: post-exfoliation care | how to lock in hydration]
Conclusion
Creating your own skincare doesn’t have to be complicated or expensive. With this DIY sugar scrub recipe, you have a versatile and effective tool for maintaining glowing, healthy skin all year round. By choosing high-quality ingredients and following a simple method, you can enjoy a luxury spa experience in the comfort of your own home. Remember to experiment with different essential oil blends and sugar types to find the combination that works best for your unique skin. Happy formulating!
Ready to start your DIY journey? Visit The Skin Science Company to find all the raw materials you need to bring your skincare creations to life. From premium carrier oils to pure essential oils, we provide the building blocks for your natural beauty routine.
Disclaimer: The information provided in this article is for cosmetic and educational purposes only. Our ingredients are intended for topical use and are not TGA-registered for therapeutic claims. Always perform a patch test before using a new product on your skin.
You May Also Like