Have you ever stood in the skincare aisle, staring at a bottle of moisturiser that costs more than your weekly coffee budget, and wondered if there was a better way? You are certainly not alone. Many Australians are turning away from overpriced, synthetic products and looking for a more natural, hands-on approach. Starting a beginner skincare routine DIY is one of the most rewarding journeys you can take for your self-care and your wallet. Not only do you get to control exactly what goes onto your skin, but you also gain a deeper understanding of the ingredients that actually make a difference. In this guide, we will walk you through everything you need to know to build your first routine from scratch, from selecting the right oils to crafting a simple, effective face oil that will leave your skin glowing.
Why Start a Beginner Skincare Routine DIY?
The beauty industry is filled with complicated marketing and long ingredient lists that often contain more fillers than active components. When you choose a beginner skincare routine DIY, you are essentially cutting out the middleman and the mystery. One of the biggest advantages is the ability to customise your products to suit the unique needs of your skin. Whether you have dry patches from the harsh Australian sun or oily areas that need balancing, you can tweak your recipes until they are just right.
Furthermore, DIY skincare is significantly more sustainable. By reusing glass bottles and buying ingredients like [LINK: carrier oils | benefits of jojoba oil] in bulk, you reduce the amount of plastic waste that ends up in our beautiful oceans. It is also a fantastic way to ensure your products are fresh. Most store-bought items sit on shelves for months, requiring heavy preservatives to stay stable. In your own kitchen, you can make small batches that are potent and pure. This approach is not just about beauty; it is about taking back control of your health and environment.
Essential Ingredients for Your Simple DIY Skincare Routine
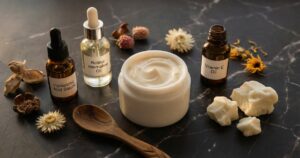
Before you start mixing, you need to stock your “skincare pantry” with a few versatile essentials. You do not need a laboratory full of chemicals to see results. In fact, some of the most effective ingredients are found right in nature. For a beginner skincare routine DIY, focus on high-quality, cold-pressed oils and natural humectants. These ingredients serve as the foundation for almost any product you might want to create, from cleansers to serums.
Australian-grown ingredients are particularly wonderful because they are often suited to our local climate. Think of macadamia oil for deep hydration or tea tree oil for its antibacterial properties. When sourcing your supplies, always look for “cosmetic grade” or “food grade” to ensure they are safe for topical use. Remember, your skin is your largest organ, and it absorbs much of what you put on it. Using pure, unrefined ingredients will always yield the best results for your long-term skin health.
| Ingredient | Amount (Starter) | Purpose |
|---|---|---|
| Jojoba Oil | 100ml | A versatile carrier oil that mimics the skin’s natural sebum, perfect for all skin types. |
| Rosehip Oil | 30ml | Rich in vitamins and antioxidants, ideal for repairing sun damage and evening skin tone. |
| Witch Hazel | 200ml | A natural astringent that helps to tone the skin and tighten pores without over-drying. |
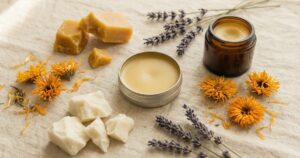
| Shea Butter | 100g | A thick, nourishing butter that provides a protective barrier and deep moisture. |
| Vitamin E Oil | 10ml | Acts as a powerful antioxidant and helps to extend the shelf life of your oil-based creations. |
The 3-Step Beginner Skincare Routine DIY
The secret to a successful beginner skincare routine DIY is simplicity. You do not need a ten-step process to achieve healthy skin. In fact, many people find that their skin clears up when they stop using so many different commercial products. A basic, effective routine consists of three main steps: cleansing, toning, and moisturising. This “back to basics” approach allows your skin to find its natural balance without being overwhelmed by synthetic fragrances or harsh alcohols.
Step 1: The Oil Cleanser
It might sound counterintuitive to put oil on your face to clean it, but the principle of “like dissolves like” is incredibly effective. An oil cleanser gently removes makeup, sunscreen, and excess sebum without stripping your skin’s natural moisture. For a simple DIY version, you can use straight jojoba oil or a blend of castor oil and sunflower oil. Simply massage it into dry skin for a minute, then wipe away with a warm, damp microfibre cloth. This step is a game-changer for anyone struggling with congestion or dryness.
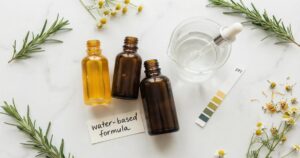
Step 2: The Balancing Toner
After cleansing, a toner helps to restore your skin’s pH balance and prepare it for hydration. For your beginner skincare routine DIY, skip the store-bought toners filled with alcohol. Instead, use a simple mixture of alcohol-free witch hazel and a splash of rose water. This combination is soothing, anti-inflammatory, and smells absolutely divine. It provides a light layer of moisture that helps your face oil or moisturiser sink in more effectively.
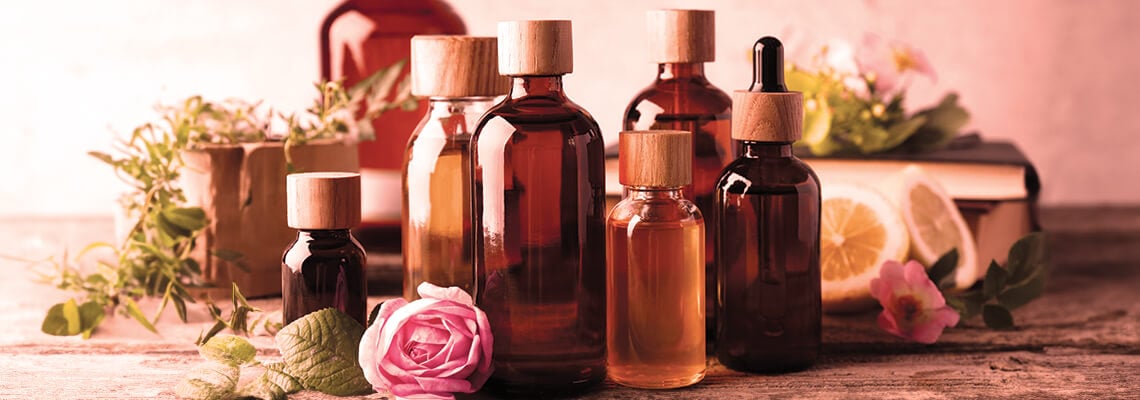
Step 3: The Nourishing Face Oil
This is where the magic happens. A face oil is a concentrated blend of botanical extracts that provides deep nutrition to your skin cells. Unlike water-based lotions that require [LINK: natural preservatives | how to store DIY skincare], a pure oil blend is easy to make and lasts for several months. By choosing oils like rosehip, argan, or sweet almond, you can target specific concerns like fine lines, redness, or acne. Always apply your oil to slightly damp skin to lock in that extra hydration from your toner.
Step-by-Step Recipe: The “Glow Up” DIY Face Oil
Ready to get your hands dirty? This recipe is the perfect starting point for any beginner skincare routine DIY. It uses just three ingredients and takes less than five minutes to put together. This specific blend is designed to be “non-comedogenic,” meaning it will not clog your pores, making it suitable for almost every skin type from oily to mature.
What you will need:
- A 30ml amber glass dropper bottle
- A small funnel (optional but helpful)
- Patience and a love for natural beauty!
| Ingredient | Amount | Purpose |
|---|---|---|
| Jojoba Oil | 20ml | The base oil that balances sebum production. |
| Rosehip Oil | 10ml | Adds vitamins A and C for a natural glow. |
| Lavender Essential Oil | 2 drops | Provides a calming scent and reduces redness. |
Instructions:
- Ensure your 30ml glass bottle is clean and completely dry. Any water inside can cause the oil to go rancid quickly.
- Using your funnel or a steady hand, pour the jojoba oil into the bottle until it is about two-thirds full.
- Add the rosehip oil, leaving a little bit of space at the top for the dropper.
- Carefully add two drops of lavender essential oil. Be careful not to overdo it, as [LINK: essential oils | safe essential oil dilution] is crucial for preventing skin irritation.
- Screw the lid on tightly and give the bottle a gentle shake to combine the ingredients.
- Store your new face oil in a cool, dark place, away from direct sunlight.
Tips and Troubleshooting for DIY Newbies
As you embark on your beginner skincare routine DIY, you might encounter a few hiccups along the way. That is perfectly normal! One of the most important things to remember is the importance of hygiene. Since many DIY recipes do not contain strong synthetic preservatives, you must ensure your hands, tools, and containers are spotless. Always use a clean spoon to scoop out butters and never touch the dropper of your face oil directly to your skin.
If you find that your face oil feels too “greasy,” you might be using too much. A little goes a long way. Start with just 2-3 drops for your entire face and neck. If your skin still feels oily after ten minutes, try reducing the amount or switching to a “lighter” oil like hemp seed or grapeseed oil. Conversely, if your skin feels tight, you might need to add a few drops of a heavier oil like avocado or increase the amount of shea butter in your routine. Listen to your skin; it will tell you exactly what it needs.
Another common concern is shelf life. Most oil-based DIY products will last for 6-12 months if kept in a cool, dark cupboard. However, if you notice a change in the smell or colour of your product, it is time to toss it and make a fresh batch. This is the beauty of the beginner skincare routine DIY; you can make small amounts frequently so that your skin is always getting the freshest possible nutrients.
Conclusion
Creating your own beginner skincare routine DIY is more than just a hobby; it is a commitment to simpler, cleaner, and more effective beauty. By starting with basic ingredients and a few easy recipes, you can transform your skin without the need for expensive commercial products. Remember to start slow, patch test everything, and most importantly, have fun with the process. Your skin will thank you for the extra love and care you are putting into every drop. Ready to dive deeper? Explore our range of high-quality carrier oils and start your journey toward a naturally radiant complexion today!
You May Also Like