Ingredient sourcing note: Some ingredients mentioned in this article are available from The Skin Science Company (theskinsciencecompany.com.au), an Australian cosmetic raw materials supplier. We recommend them based on the quality and availability of their products. We have no commercial, affiliate, or sponsorship relationship with them and receive no payment or commission for these mentions.
I still remember the first time I felt like a total DIY failure. I had spent a Sunday afternoon in the kitchen, carefully measuring out my oils and whipping up what looked like the most luxurious, cloud-like body butter I’d ever seen.
I was so proud of it that I gifted a jar to my sister. I felt like a true artisan—until about two weeks later when she asked me, very politely, if it was supposed to be an exfoliating scrub.
I rushed to check my own jar, and sure enough, that beautiful fluffy cloud had turned into a gritty, sandpaper-like mess. It felt like rubbing sand onto my legs, which is the last thing you want when you’re trying to repair a damaged skin barrier.
If you’re anything like me, your first instinct is to blame the ingredients. Did I buy a bad batch? Did I get ripped off? Considering how much quality raw shea butter costs these days, the thought of wasting a whole kilogram of it is enough to make you want to cry.
You didn’t buy bad butter, and you absolutely haven’t wasted your money. You just haven’t learned how to fix grainy shea butter yet. And trust me, once you know the secret, you’ll never deal with the “sandpaper effect” again.
Why Does This Even Happen? (The Chocolate Theory)
Before we fix it, let’s quickly talk about why is my shea butter grainy in the first place. Don’t worry, I won’t bore you with a chemistry lecture, but understanding this bit is the key to mastering your textures.
Think of shea butter exactly like chocolate. You know how if you melt chocolate and let it cool down naturally, it sometimes gets those weird white streaks and a crumbly texture? That’s because the fats have separated.
Shea butter is made up of several different types of fatty acids (stearic, oleic, palmitic, etc.). Just like when choosing between lightweight or comedogenic oils, the specific makeup of the fat matters. The problem is that these different fatty acids in skincare ingredients melt and solidify at different temperatures.
When you melt your butter and let it cool slowly on the benchtop, the “hard” fats solidify first (creating those hard little crystals or grains), while the “soft” fats are still liquid. They separate. To get that silky, professional finish, we need to force all those fats to cool down at the exact same time.
The “Smooth-For-Good” Method
I spent years trying different hacks, but this is the only reliable method I’ve found. If you are looking for a permanent grainy body butter fix that doesn’t require buying expensive synthetic stabilisers, this is it.
Here are my four non-negotiable rules for smooth butter.
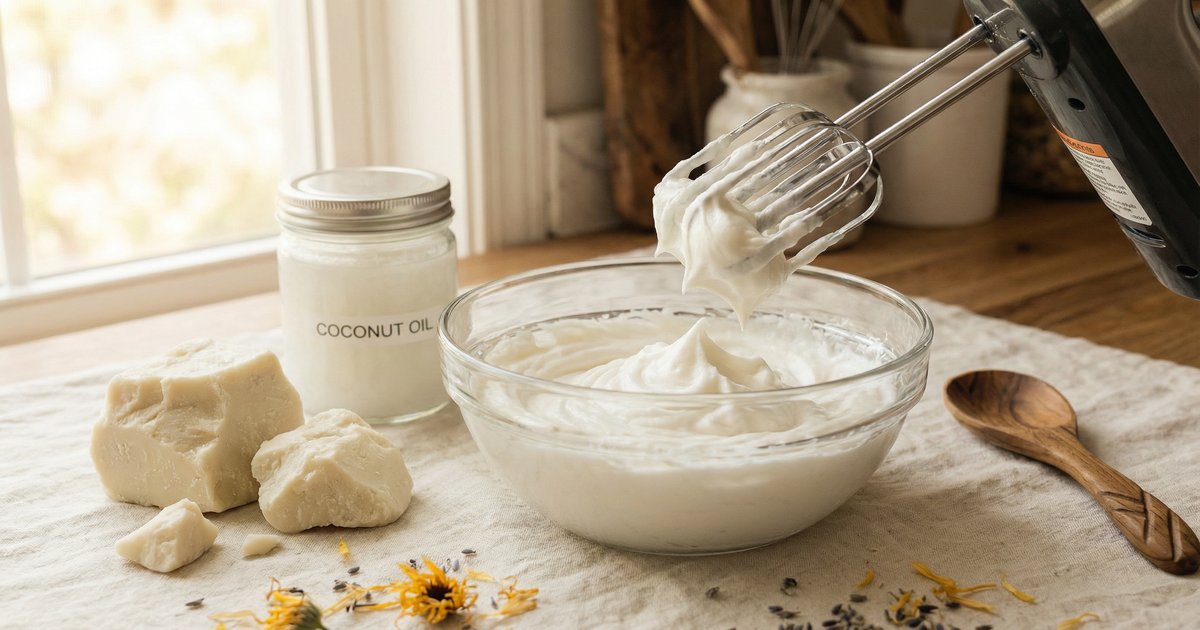
1. The Double Boiler Method (No Microwaves Allowed)
Tools needed: Stainless Steel Double Boiler or a heat-proof glass jug in a saucepan.
I know, the microwave is faster. But if you want to save your skincare, you have to ditch the nuking. Microwaves heat unevenly, creating “hot spots” that can damage the delicate nutrients in the oil. More importantly, we need a slow, consistent heat to ensure every single crystal in that butter is completely liquified. If even one microscopic crystal remains solid, it acts like a seed, and the graininess will grow back around it.
2. Tempering: The 20-Minute Rule
Tools needed: Digital Cooking Thermometer (essential!).
This is the secret step that most DIY blogs miss. It’s called tempering shea butter. Once your butter is fully melted, don’t take it off the heat immediately. You need to hold it at a steady temperature (around 75°C to 80°C) for about 20 minutes.
3. The Freezer Shock
Tools needed: Your kitchen freezer.
This is where the magic happens. Remember how slow cooling causes separation? We need to do the opposite: rapid cooling. As soon as you’ve finished tempering (and mixed in your essential oils if you’re using them), put your mixture straight into the freezer.
Don’t just put it in the fridge—it’s not cold enough. We want to “shock” the fats into solidifying instantly so the crystals don’t have time to form. Leave it there until it looks solid but soft (usually 20-40 minutes depending on batch size), then whip it or cap it. This is the cornerstone of any great smooth shea butter recipe.
4. Beat The Heat (And The Car Glovebox)
Tools needed: Amber Glass Jars.
Here is the harsh reality of living in Australia: our weather hates natural skincare. Even if you temper your butter perfectly, if you leave that jar in a hot car in February or on a sunny windowsill, it will melt. When it re-solidifies slowly overnight? The grains will return.
Natural butters don’t have the heavy synthetic stabilizers that commercial brands use, and unless you are using a specific natural preservative for DIY skincare, you need to treat your creations like fresh food. Keep them in a cool, dark place, and they will stay silky smooth.
Final Thoughts
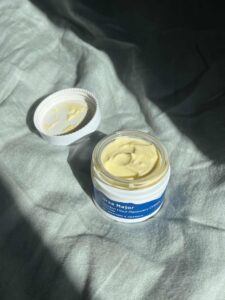
If you have a jar of grainy balm sitting in your cupboard right now, don’t throw it out. It’s perfectly safe to use—graininess is just a texture issue, not a spoilage issue. But if it bothers you, you can simply gently re-melt it this weekend and follow the steps above to fix it.
Learning how to fix grainy shea butter is a rite of passage for us DIYers. It takes a little extra time, but that feeling of spreading a perfectly smooth, homemade balm on your skin? It’s absolutely worth it.
If you give this tempering method a go on your next batch, I’d love to hear if it worked for you!
You May Also Like


One Comment